How to install and activate crowdsec in pangolin

How to install and active crowdsec in pangolin

Prerequisits: Succesful installation of pangolin + DNS entries

Domain and DNS entries:

For beginners: You should own a fresh domain name with no other A records than these 2, pointing to your VPS IP (example):

Succesful installation of pangolin

  • You should already have pangolin installed as written in the Docs.

  • And you should have gotten this message at the end of installation, like this:

Installation complete!

To complete the initial setup, please visit:

https://pangolin.geekgully.de/auth/initial-setup

Diesen Link aufrufen und admin account anlegen!

Web-Interface of pangolin

You sould have visited the Web-Interface of your pangolin instance at least once, you should have setup the organisation already. No need to have a site yet.

Installation of crowdsec

Installation procedures

Start the installer of pangolin again like this:

sudo ./installer

You should see the following text:

Welcome to the Pangolin installer!

This installer will help you set up Pangolin on your server.

Please make sure you have the following prerequisites:

  • Open TCP ports 80 and 443 and UDP ports 51820 and 21820 on your VPS and firewall.
  • Point your domain to the VPS IP with A records.

http://docs.fossorial.io/Getting%20Started/dns-networking

Lets get started!

Would you like to run Pangolin as Docker or Podman containers? (default: docker):

Here you respond with ENTER

You receive this text now:

Looks like you already installed, so I am going to do the setup…

=== CrowdSec Install === Would you like to install CrowdSec? (yes/no) (default: no):

Respond with YES

Next:

This installer constitutes a minimal viable CrowdSec deployment. CrowdSec will add extra complexity to your Pangolin installation and may not work to the best of its abilities out of the box. Users are expected to implement configuration adjustments on their own to achieve the best security posture. Consult the CrowdSec documentation for detailed configuration instructions. Are you willing to manage CrowdSec? (yes/no) (default: no):

Respond with YES

Next:

Detected values: Dashboard Domain: pangolin.geekgully.de Let’s Encrypt Email: mail@geekgully.de Badger Version: v1.2.0 Are these values correct? (yes/no) (default: yes):

Respond with YES if it’s correct

Next:

Installation complete!

To complete the initial setup, please visit:

https://pangolin.geekgully.de/auth/initial-setup

Now crowdsec is installed, congratulations!

crowdsec acitivation:

Execut these two commands now to activate crowdsec:

docker compose down

docker compose up -d

Is all working correctly?

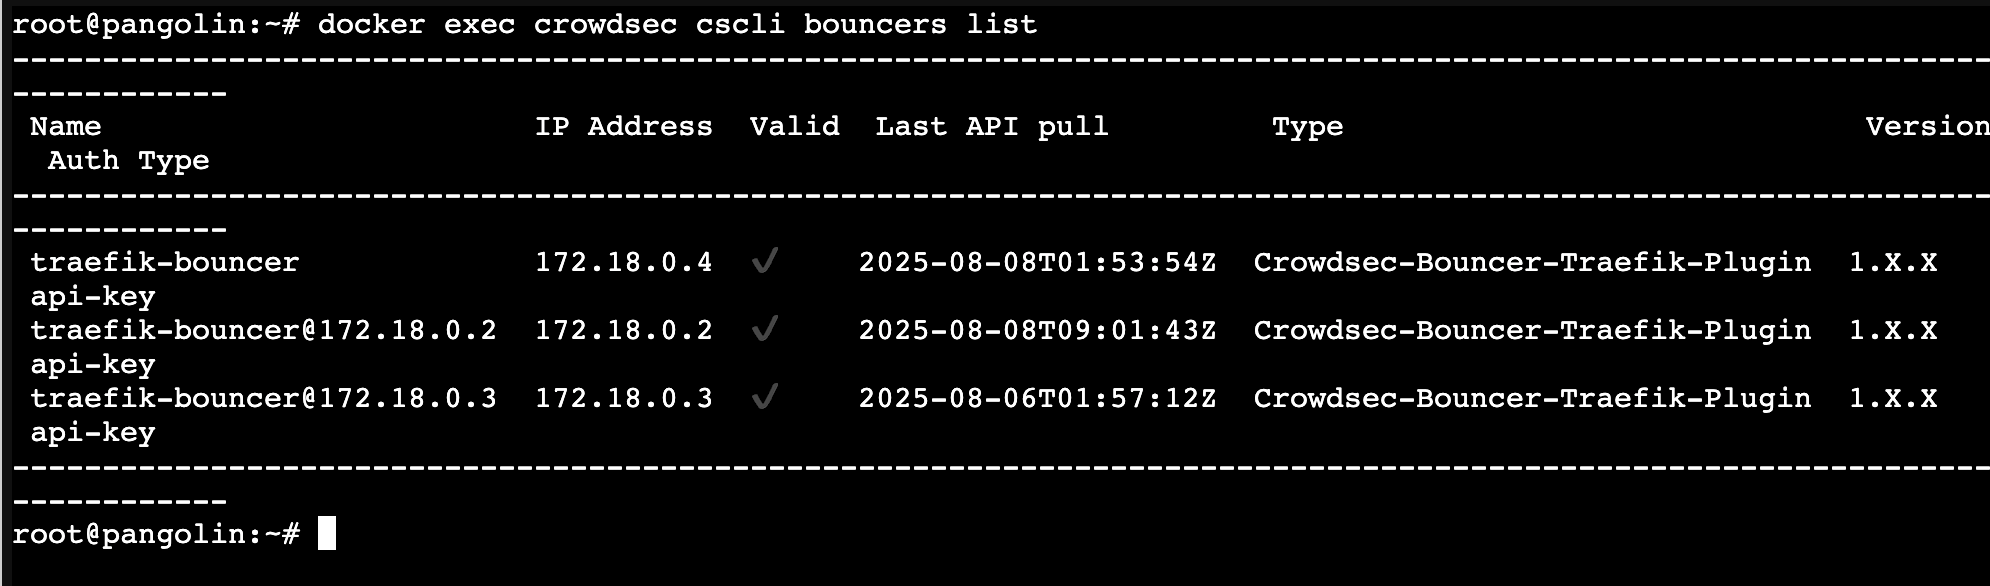
To see if crowdsec is working correctly, send this command:

docker exec crowdsec cscli bouncers list

When you see a text output like this, all is working well:

---------------------------------------------------------------------------------------------------------------
 Name             IP Address  Valid  Last API pull         Type                             Version  Auth Type
---------------------------------------------------------------------------------------------------------------
 traefik-bouncer  172.18.0.4  âś”     2025-08-05T13:55:54Z  Crowdsec-Bouncer-Traefik-Plugin  1.X.X    api-key
---------------------------------------------------------------------------------------------------------------

Crowdsec dashboard

If you already have a login to the crowdsec dashboard, you can add this crowdsec instance to the dashboard. If not, use the link to register first.

Add pangolin to your crowdsec dashboard

Show enrollment key

Klick in your crowdsec dashboard on the button “Enroll command”, you will see a window with a command like this:

sudo cscli console enroll -e context <MyEnrollemtKey>

Copy the part at the end, after “context”, which is marked MyEnrollmentKey

Enroll command

Now execute the following command in your ssh console on the VPS to add your pangolin instance with crowdsec to your dasboard, add the Key to the end of the command:

docker exec crowdsec cscli console enroll <MyEnrollmentKey>

crowdsec Dashboard

Switch to your crowdsec dashboard now, you will see a popup like this after a view moments:
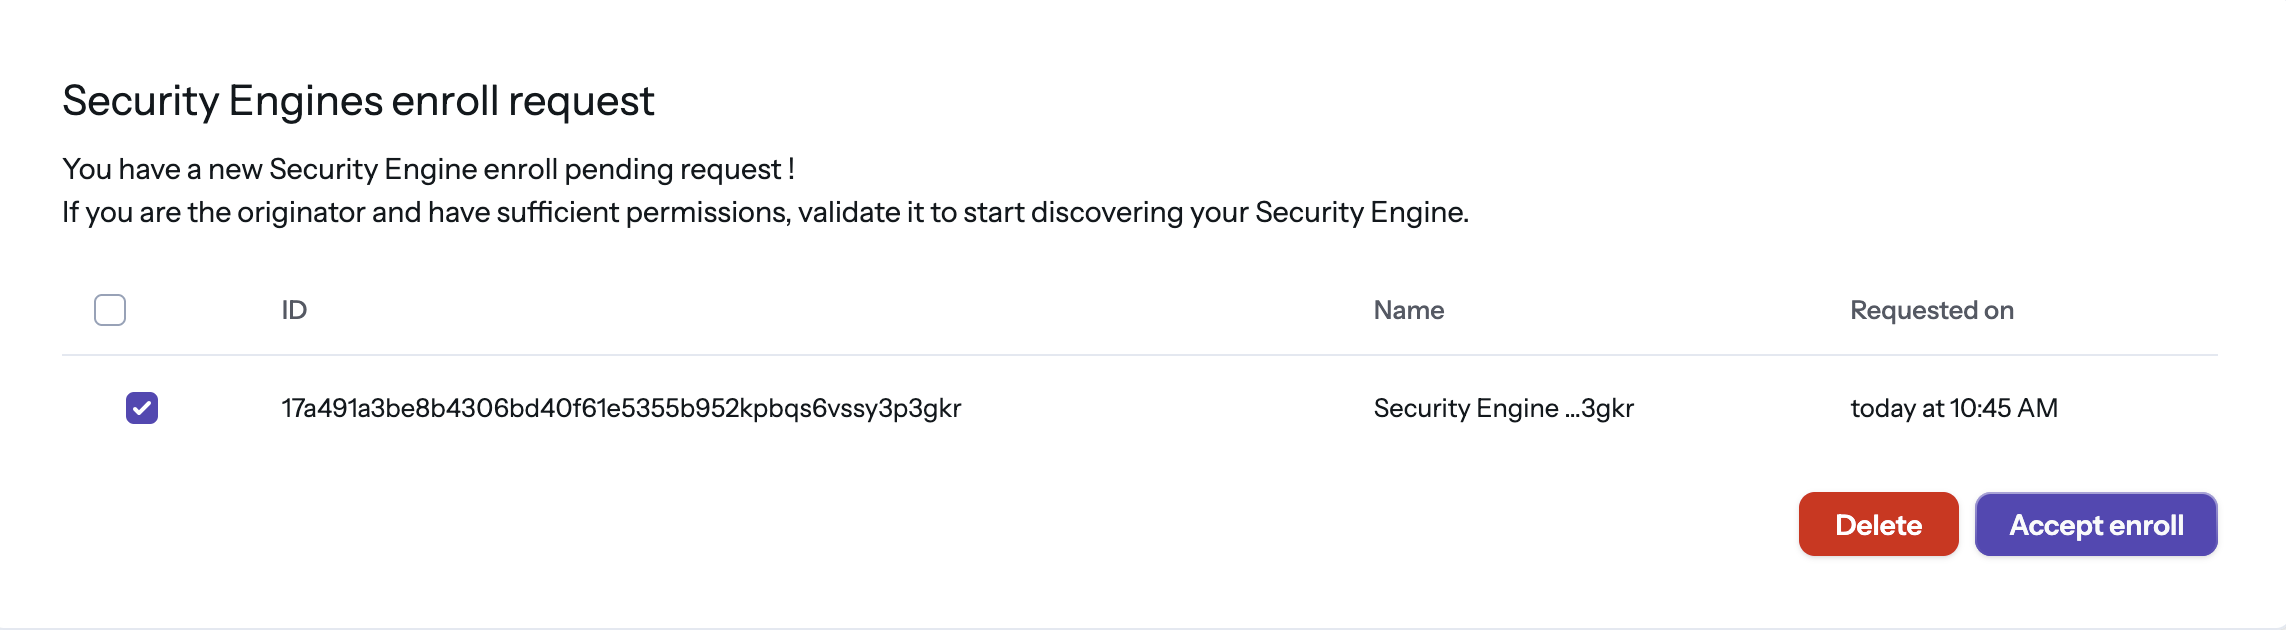
Klick to accept it.

After a view seconds, you see your pangolin instance in the corwsec dashboard, like this:

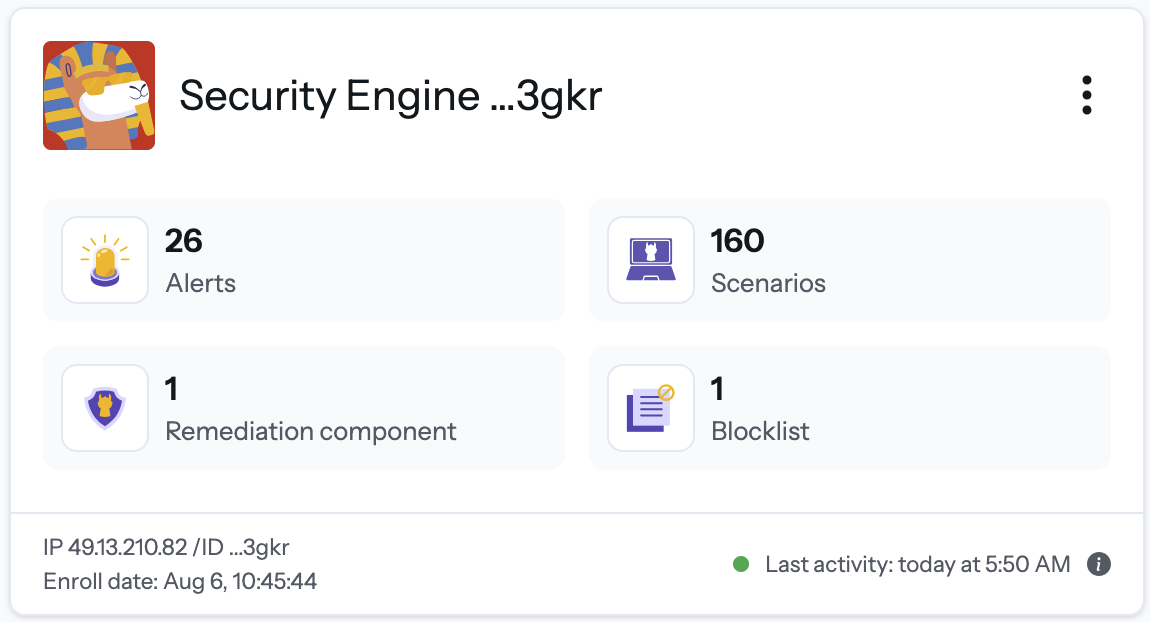
Now you’re set and ready!

You have your pangolin instance with crowdsec added to the dashbord and you can watch which treads for your pangolin instance arise.

Note at the end:

@hhf.technoloy created a traefik dashboard to visualize what happends in you pangolin instance, I will write a guide for it later.

4 Likes

Is it normal that I have 3 bouncers?

1 Like

I installed pangolin with crowdsec two times, always had only one bouncer..

1 Like

Strange, I did everything according to the official documentation. Fortunately, everything works as it should. My instance has been running since the first release; maybe some update caused that.

1 Like

it will work. all bouncers are independent but only one is connected. whcih one is magic….hehehehe

This is because the IP of your traefik instance is changing when docker goes down/up. I have similar happening on one of my VPS setups, it doesn’t seem to make any difference apart from the clutter. On a cleaner VPS I have with fewer containers Traefik keeps the same IP and I only have the one bouncer registered.

1 Like

That makes sense. Thanks for the explanation.

1 Like

Can this install of crowdsec also be used for securing the VPS on which Pangolin is running?

1 Like

yes why not, it definitely can

How to do this? Any guides for this?

1 Like

You should not use docker crowdsec if you install this on VPS.

Guide for Debian and Ubuntu Systems

This document provides instructions for installing and configuring CrowdSec on Debian and Ubuntu.

1. Install CrowdSec

The installation process begins with adding the official CrowdSec repository and then installing the package using the apt package manager.

  1. Execute the installer script to add the CrowdSec repository to your system’s sources.
    curl -s https://install.crowdsec.net | sudo bash
    
  2. Install the CrowdSec agent.
    sudo apt update
    sudo apt install crowdsec -y
    

Optional: Change CrowdSec Default Port

To enhance security or avoid port conflicts, you may change the default port (8080) for the Local API (LAPI) and configure it to listen on all network interfaces.

  1. Edit the main configuration file /etc/crowdsec/config.yaml. Modify the listen_uri under the api.server section.

    api:
    	server:
    		listen_uri: 0.0.0.0:9090
    
  2. Update the LAPI credentials file at /etc/crowdsec/local_api_credentials.yaml to point to the new port.

    url: http://127.0.0.1:9090
    

Start and Enable the CrowdSec Service

Ensure the CrowdSec service starts on boot and run it immediately. These commands are standard across systems using systemd.

sudo systemctl enable crowdsec
sudo systemctl start crowdsec

2. Install CrowdSec Firewall Bouncer

The firewall bouncer is the component that applies decisions (e.g., blocking an IP address) at the firewall level.

Recent versions of Debian and Ubuntu use nftables as the default firewall backend. However, iptables is also available.

  • For nftables (Recommended for modern systems):
    sudo apt install crowdsec-firewall-bouncer-nftables -y
    
  • For iptables (If preferred or required by your environment):
    sudo apt install crowdsec-firewall-bouncer-iptables -y
    

3. CrowdSec Configuration

The following steps configure CrowdSec to monitor your applications. These commands are part of the CrowdSec toolchain and are independent of the underlying operating system.

  1. Install the necessary collections for Traefik and the Application Security (AppSec) component.

    sudo cscli collections install crowdsecurity/traefik crowdsecurity/appsec-virtual-patching crowdsecurity/appsec-generic-rules
    
  2. Enable the AppSec component by creating a dedicated acquisition configuration file.

    sudo mkdir -p /etc/crowdsec/acquis.d
    sudo tee /etc/crowdsec/acquis.d/appsec.yaml > /dev/null << EOF
    listen_addr: 0.0.0.0:7422
    appsec_config: crowdsecurity/appsec-default
    name: myAppSecComponent
    source: appsec
    labels:
      type: appsec
    EOF
    
  3. Configure log acquisition by adding the path to your Pangolin/Traefik logs in the main acquisition file, /etc/crowdsec/acquis.yaml. Replace /srv/pangolin with the correct path for your deployment.

    ---
    filenames:
      - /srv/pangolin/config/traefik/logs/*.log
    labels:
      type: traefik
    
  4. Restart the CrowdSec service to apply all configuration changes.

    sudo systemctl restart crowdsec
    

Create a Bouncer API Key

Generate a unique API key for your Pangolin bouncer. You must save the generated key for use in the next section.

sudo cscli bouncers add pangolin-traefik

4. Configure Pangolin CrowdSec Integration

This section details the configuration within your Docker and Traefik files. These steps are not dependent on the host operating system.

  1. Remove the pre-existing CrowdSec service definition from your Pangolin docker-compose.yaml file, as CrowdSec is now running directly on the host.

  2. In your docker-compose.yml, modify the gerbil service definition to include the extra_hosts section. This allows the container to resolve host.docker.internal to the host machine’s IP address.

        container_name: gerbil
        extra_hosts:
          - "host.docker.internal:host-gateway"
        depends_on:
          pangolin:
            condition: service_healthy
    
  3. In your Traefik dynamic configuration file (config/traefik/dynamic_config.yml), update the CrowdSec middleware parameters to point to the host machine’s CrowdSec services.

    crowdsecAppsecHost: host.docker.internal:7422
    crowdsecLapiHost: host.docker.internal:9090
    crowdsecLapiKey: <key_from_cscli_bouncers_add_command>
    

5. Optional Configurations

These adjustments are also independent of the operating system.

Configure Firewall Bouncer to Ignore HTTP Bans

To use captcha-based remediations within Traefik instead of firewall-level bans for web-related incidents, modify the bouncer configuration.

Add the following line to /etc/crowdsec/bouncers/crowdsec-firewall-bouncer.yaml:

scenarios_not_containing: ["http"]

Configure a Captcha-First Remediation Profile

This profile instructs CrowdSec to issue a captcha remediation for the first three offenses from an IP within a 48-hour window for HTTP-related scenarios. Subsequent offenses will result in a standard ban.

Add the following profile to the top of /etc/crowdsec/profiles.yaml:

name: captcha_remediation
filters:
  - Alert.Remediation == true && Alert.GetScope() == "Ip" && Alert.GetScenario() contains "http" && GetDecisionsSinceCount(Alert.GetValue(),"48h") < 3
decisions:
 - type: captcha
   duration: 4h
on_success: break
---