This guide walks you through using AWS CloudFormation to create test-ready authentication servers like Authelia, Authentik, PocketID and Zitadel to integrate with Pangolin’s Middleware Manager. These preconfigured stacks make it easy to stand up external auth services for testing. Please note, these are purely for testing!!

Github Repo here: GitHub - oidebrett/auth-servers-on-aws-ec2: Cloudformation Templates to quickly set up Auth Servers on AWS EC2
 New: CloudFormation Template Customizer Script
To simplify the process, a shell script is included that automatically customizes CloudFormation templates with your domain, email, subdomain, and SSH IP restrictions. No manual editing of templates needed!
Output: Customized CloudFormation templates are stored in an
output/folder, ready to deploy via the AWS Console.
 Available Authentication Stacks
- Authelia –
vps_ec2_authelia.yaml - Authentik –
vps_ec2_authentik.yaml - PocketID –
vps_ec2_pocketid.yaml - Zitadel –
vps_ec2_zitadel.yaml - Base Docker VPS (no auth stack) –
vps_ec2_base_docker.yaml
 Step 1: Run the Customization Script
From your project root, run:
chmod +x ./customize_templates.sh
./customize_templates.sh
You’ll be prompted to enter:
- Your domain name (e.g.,
mydomain.com) - Subdomain for the auth service (e.g.,
auth) - Email for Let’s Encrypt (for SSL)
- Your IP (or CIDR) for SSH access
Example:
Enter your domain name (e.g., example.com): yourdomain.com
Enter authentication subdomain (e.g., auth): auth
Enter email for Let's Encrypt certificates: admin@yourdomain.com
Enter your IP address for SSH access (or 0.0.0.0/0 for any IP): 0.0.0.0/0
If your IP is a single address, the script automatically adds
/32CIDR notation.
 Step 2: Launch the CloudFormation Stack
- Go to CloudFormation Console
- Click “Create stack” > “With new resources (standard)”
- Choose Upload a template file, and select one of the files in the
output/directory - Name your stack (e.g.,
AuthServerStack) - Click through the steps and deploy
 Step 3: Configure DNS for Your Subdomain
After deployment:
-
Go to EC2 Console
-
Find your new instance and note the Public DNS name
-
In your DNS provider (e.g., Cloudflare):
- Create a CNAME record pointing your subdomain (e.g.,
auth.mydomain.com) to the EC2 DNS - Cloudflare users: set SSL/TLS mode to Full
- Create a CNAME record pointing your subdomain (e.g.,
Example DNS entry:
auth.mydomain.com → ec2-XX-XX-XX-XX.region.compute.amazonaws.com
 Step 4: SSH Into Your VPS
Use your previously created or selected EC2 key pair:
ssh -i "VPS.pem" ubuntu@<your-ec2-public-dns>
Check logs to verify the setup:
cat /var/log/user-data.log
Wait about 2 minutes for the server to initialize and the installation to complete.
Note, Authentik will take longer to initialize.
Manually bring up containers:
cd ~
sudo docker compose up -d
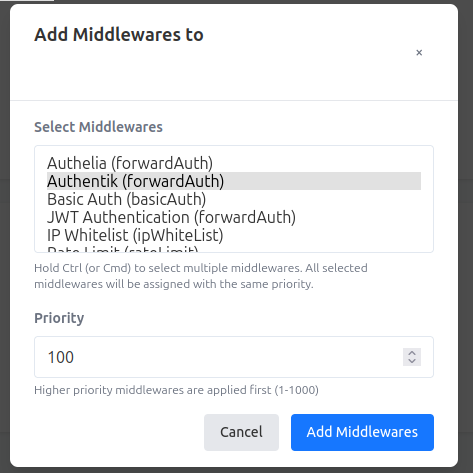
 Step 5: Attach Middleware in Pangolin
-
Open the Pangolin Middleware Manager
-
Go to the Middlewares tab
-
Ensure
authelia,authentik, orpocketidmiddleware is listed and configured correctly:- id: authelia name: Authelia type: forwardAuth config: address: https://auth.mydomain.com/api/verify -
Go to Dashboard → Manage on a resource
-
Click Add Middleware, choose your auth provider, and save
 Step 6: Test Access
Open a browser and navigate to your protected Pangolin resource:
https://yourapp.mydomain.com
You should be redirected to your auth service (Authelia, Authentik, or PocketID), and after logging in, returned to your app.
Using Authentik for the first time
To start the initial setup, navigate to https://yourapp.mydomain.com/if/flow/initial-setup/
Using PocketID for the first time
To initiate Pocket ID setup, navigate to https://yourapp.mydomain.com/login/setup
Using Zitadel for the first time
To start the initial setup, navigate to https://yourapp.mydomain.com/
Login with the default credentials:
Username: root@yourdomain.com
Password: RootPassword1!
Change the password and (email if required)
Please Note, you should definitely follow the initialize steps for your authentication server as leaving in un-initialized state is not recommended.
 Step 8: Integrate with Middleware Manager
-
Open the Pangolin Middleware Manager
-
Go to Middlewares tab
-
Ensure your
AutheliaorAuthentikmiddleware is listed and correctly configured-
Example for Authelia:
{ "address": "https://authelia.yourdomain.com/api/verify?rd=https://authelia.yourdomain.com", "authResponseHeaders": [ "Remote-User", "Remote-Groups", "Remote-Name", "Remote-Email" ], "trustForwardHeader": true } -
Example for Authentik:
 {
 "address": "http://authentik-proxy:9000/outpost.goauthentik.io/auth/traefik",
 "authResponseHeaders": [
    "X-authentik-username",
    "X-authentik-groups",
    "X-authentik-email",
    "X-authentik-name",
    "X-authentik-uid"
 ],
 "trustForwardHeader": true
 }
-
-
Go to Dashboard > Manage on the resource you want to protect
-
Click Add Middleware
-
Select your new external middleware (e.g., Authelia or Authentik)
-
Save and test
Special Setup for Authentik on a Separate Host
Since you’ve deployed Authentik on a separate host from your application servers, you’ll need to set up an Authentik Outpost:
-
Create a new Outpost in Authentik:
- Go to your Authentik admin interface
- Navigate to Outposts and create a new Proxy Outpost
- Click View on the new outpost and copy the token
-
Add the Authentik Proxy to your application server’s docker-compose.yml:
authentik-proxy: image: ghcr.io/goauthentik/proxy container_name: authentik-proxy ports: - 9000:9000 - 9443:9443 environment: AUTHENTIK_HOST: https://authentik.yourdomain.com AUTHENTIK_INSECURE: "false" AUTHENTIK_TOKEN: REPLACE_WITH_YOUR_TOKEN # Optional: Set this if your internal communication URL differs from the public URL # AUTHENTIK_HOST_BROWSER: https://external-domain.tld labels: traefik.enable: true traefik.port: 9000 traefik.http.routers.authentik.rule: Host(`authentik.yourdomain.com`) && PathPrefix(`/outpost.goauthentik.io/`) traefik.http.middlewares.authentik.forwardauth.address: http://authentik-proxy:9000/outpost.goauthentik.io/auth/traefik traefik.http.middlewares.authentik.forwardauth.trustForwardHeader: true traefik.http.middlewares.authentik.forwardauth.authResponseHeaders: X-authentik-username,X-authentik-groups,X-authentik-entitlements,X-authentik-email,X-authentik-name,X-authentik-uid,X-authentik-jwt,X-authentik-meta-jwks,X-authentik-meta-outpost,X-authentik-meta-provider,X-authentik-meta-app,X-authentik-meta-version -
Start the Authentik Proxy:
docker compose up -d authentik-proxy -
Configure your middleware in Pangolin to use the local proxy:
- id: authentik
  name: Authentik
  type: forwardAuth
  config:
    address: http://authentik-proxy:9000/outpost.goauthentik.io/auth/traefik
This setup allows your application server to communicate with your external Authentik instance through the local proxy.
 Summary
With just a few inputs and one command, the CloudFormation Template Customizer sets up ready-to-deploy authentication servers tailored to your environment. It’s perfect for securely testing external authentication flows with Pangolin and its Middleware Manager.
Final Important Note:
You should go into AWS Cloudformation and delete your stack otherwise you will incur costs.
Troubleshooting
If you get an error like this after running pocketid
traefik | 2025-05-12T10:55:46Z ERR Unable to obtain ACME certificate for domains error="unable to generate a certificate for the domains [auth.yourdomain]: error: one or more domains had a problem:\n[auth.yourdomain] invalid authorization: acme: error: 403 :: urn:ietf:params:acme:error:unauthorized :: XX.XX.XX.XX: Invalid response from http://auth.yourdomain.com/.well-known/acme-challenge/kFm8QW5WJbhFTNw1preCE5DXNXZWNxgaEmeUCadYkB8: 404\n" ACME CA=https://acme-v02.api.letsencrypt.org/directory acmeCA=https://acme-v02.api.letsencrypt.org/directory domains=["auth.yourdomain.com"] providerName=myresolver.acme routerName=pocketid@docker rule=Host(`auth.yourdomain.com`)
its because letsencrpyt is sending a challenge to the subdomain. You will need to set up your DNS for the subdomain and try again.
If you get errors creating letencrypt certificates using certbot
An unexpected error occurred:
too many certificates (5) already issued for this exact set of domains in the last 168h0m0s, retry after 2025-05-13 21:05:08 UTC: see https://letsencrypt.org/docs/rate-limits/#new-certificates-per-exact-set-of-hostnames
its because you have hit the letsencrypt rate limit. You can either wait or use a different domain. Or you can try the --staging flag in the certbot command.
The Certificate Authority failed to download the challenge files from the temporary standalone webserver started by Certbot on port 80. Ensure that the listed domains point to this machine and that it can accept inbound connections from the internet.

Some challenges have failed.
This is because letsencrypt cant reach your server. You may need to open port 80 in your security group AND make sure that you have set up your DNS correctly.
 Thanks for Reading
If you’re experimenting with new auth providers or building out secure environments for your self-hosted services, this streamlined setup can save hours of work. Feel free to contribute improvements or additional templates to the repo.
Happy self-hosting! ![]()
![]()
---