If you’re a passionate music lover with a vast collection of CDs, particularly from the metal and grunge scenes of the late 90s and early 2000s, you might find managing your library increasingly challenging. With nearly 100 of CDs in hand, I once relied on Google Music to store my MP3s.
However, as Google transitioned to YouTube Music and the industry shifted towards selling individual songs without granting true ownership rights, this approach became cumbersome. What I truly desired was a way to carry my entire collection in my pocket. To achieve this, I set up a home server using Jellyfin, an open-source media server that allows for seamless streaming of your music library. By ripping every CD I own to my data server and accessing it through Finamp (an app available on Android), I now have my music readily available wherever I go.
This guide will detail the setup process I employed; however, your configuration may differ based on your hosting preferences and internet service provider’s capabilities.
My Unraid Server
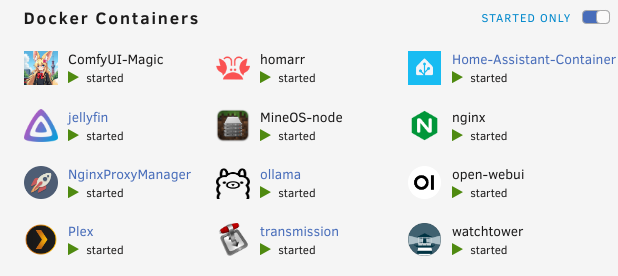
All of my services are currently hosted by Unraid as independent docker containers. I found Unraid to be a convenient way to install services easily with their apps library, docker management, and virtual machine installation. Unraid also has support for Nvidia graphics cards and I’ve been hosting a number of AI applications.
One important feature that I really appreciate is Unraid’s stripe parity for data protection. If one drive fails it’s easy to replace and rebuild it using the existing drives. When a drive fails (or starts failing), Unraid creates a virtual drive that keeps the data available until the drive can be replaced.
My Unraid docker containers
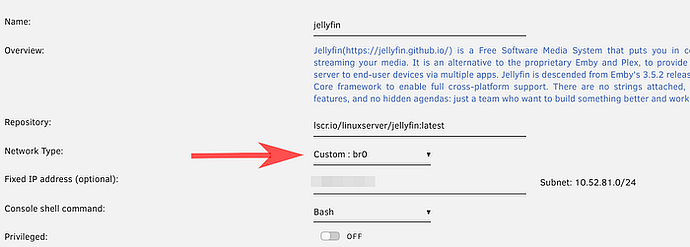
Each docker image is located on it’s own virtual network address rather than using a bridge or a host connection. This allows them to easily communicate with each other and avoids several problems when I’m trying to figure out why one docker isn’t communicating with another.
Docker Settings for br0
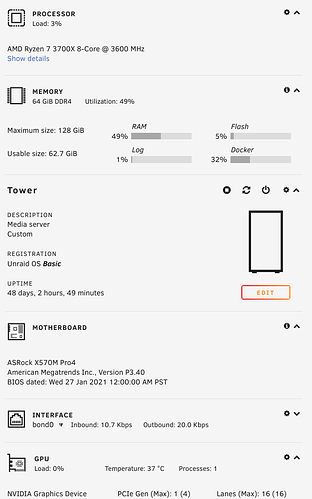
My Unraid box uses the 6 drive license (one time payment), has 64 GB of Ram and an AMD Ryzen 7 3700X processor. I got lucky and have a GPU that doesn’t work as a graphics processor but handles AI tasks just fine.
Unraid System
Jellyfin
Using the Apps in Unraid I installed the latest jellyfin docker from the linux server library.
Jellyfin Docker Image
Libraries are defined in Jellyfin by their virtual location within the docker container. Each library I knew I was going to add to the Jellyfin database I gave it’s own parameter entry as a path. You can see that at one point I tried Airsonic, but now I don’t want to move my music to a different location.
Jellyfin Path Settings
New path entries can be modified or added when setting up Jellyfin.
Now if all I wanted to do was host all my music and other media on the network then this is where I would stop. But I wanted to host my content live on the internet. So I kept going.
Nginx Proxy Manager
The Nginx Proxy Manager allows internal services to be accessible from the world wide web. The proxy manager handles SSL certificates and will also route traffic to the correct destination. This article from Amit Kumar Shinde Understanding Nginx As A Reverse Proxy does a much better job explaining than I can.
Installing the proxy manager docker was straightforward with no changes to settings. I setup my Jellyfin to be reachable from my music DNS entry and the SSL I got from Cloudflare (I’ll discuss this more later).
Router Configuration
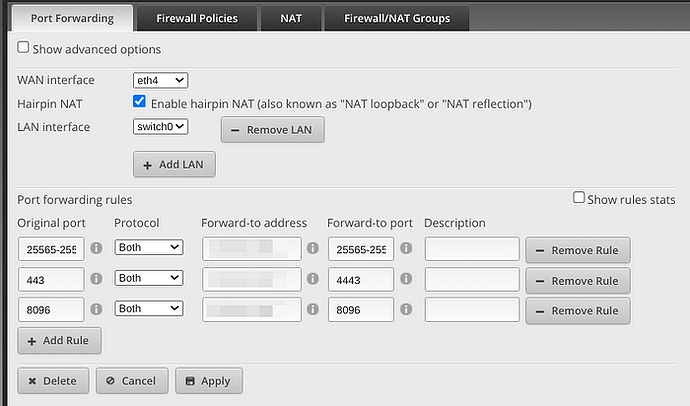
Once my Nginx docker was setup, I was able to configure my router to forward traffic to the docker.
Port forwarding 443 to my Nginx Proxy Manager
All external SSL traffic is port forwarded to the Nginx server where it will reverse proxy the information and forward it on to my other docker containers.
Get a Static IP Address
In order to host my services to the web, I required a static IP address. This turned out to be a little complicated. You can get around having a dynamic IP address with services like DynDNS in some cases, but my IP provider (ImOn) uses a CGNAT which doesn’t always work for some some services (like Minecraft). So I needed a real static IP address.
I called up ImOn and asked for a business static IP address. They were able to switch my account for free, and because I’m not really a business, don’t charge me the additional business account fee.
I’ve seen some news that Ipv6 will actually help get around this issue, but I didn’t do much research on it. Ipv6 has been around for like 3 decades now and doesn’t seem to have caught on. So it’s not the first thing I think about when trying to solve problems like this.
My Cloudflare Account
Cloudflare is the public portal for all my internet traffic. Cloudflare provides a ton of internet services completely free. All of my external DNS is being hosted by Cloudflare and it provides free SSL certificates. Cloudflare also monitors traffic to your site and provides various watchdog and security services all at no cost.
If you’re going to host a site on your own server, definitely get a Cloudflare account.
Domain Registration
I purchased my domain a long time ago through Google Domains. My domain was eventually transferred to Squarespace (formally as a Google Domain) and I still pay a small yearly fee just to have it. I add my domain to Cloudflare and administer all of my DNS and security through there.
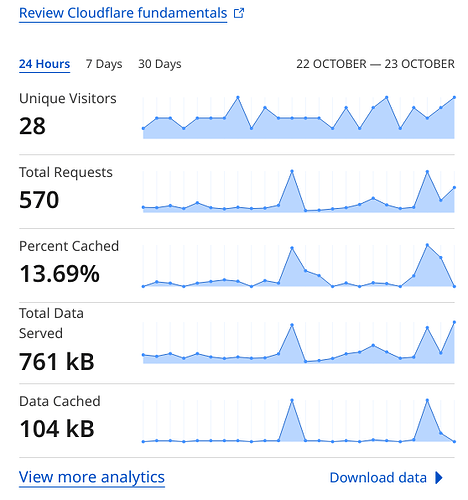
Cloudflare Stats
DNS Entries
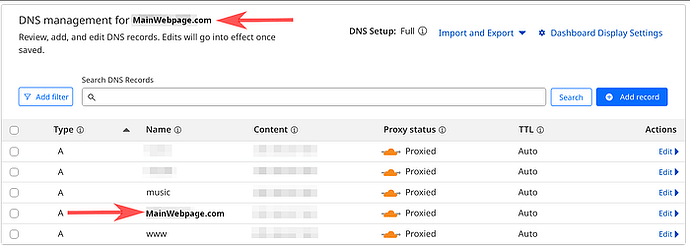
From the image below you can see that my root domain is established “MainWebpage.com”, and I have several domain entries.
Setting up the DNS
The root domain also get’s its own domain entry, but others are created to allow the DNS to provide context to the URL. I have several domain entries, all with a unique purpose, I show one for “www”, as just a launch point, and one for my Jellyfin server as “music”.
For more information on how DNS works, check out Cloudflare’s article.
SSL Certificate
Cloudflare also provides a free SSL certificate. I created my SSL certificate to ensure that all traffic from my DNS entries is encrypted. There are a number of security protocols that have popped up making some internet browsers (Looking at you Google) will not even allow you to access sites without an encrypted connection.
NGINX Proxy Hosts
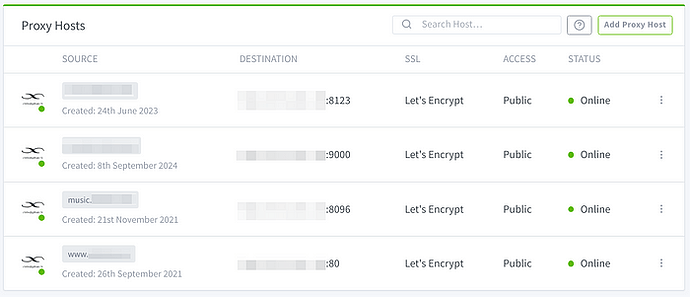
Once I had the SSL certificate, I created the proxy entries in the NGINX Proxy Manager In the image below, we’ve established several proxy sources. Remember when we set up the router to send all 443 traffic to the Nginx Proxy Manager? Here the proxy manager will parse out the domains from the Cloudflare DNS and rout them to their final destination on the network.
Nginx Proxy Hosts
Each network location is unique, and in my case, each network location represents a different docker instance on my Unraid server.
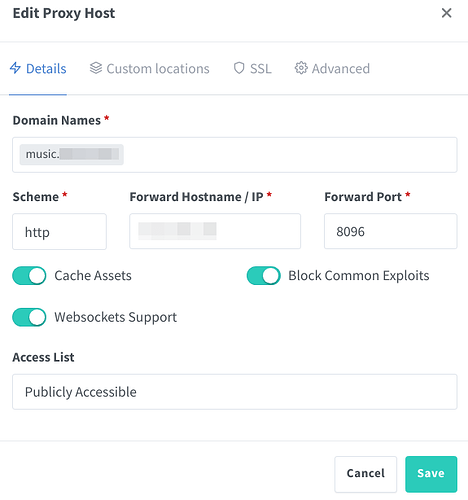
Nginx Edit Settings
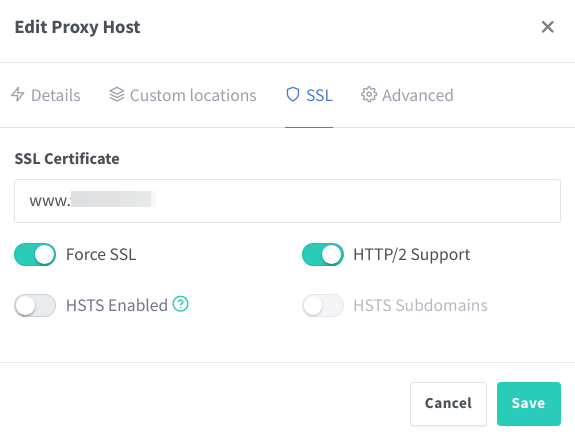
Each proxy entry is setup the same way. Internally, all traffic is HTTP (unsecured). Each proxy entry also uses the SSL provided by Cloudflare. Traffic will come into the proxy manager, be decrypted, and sent to the correct docker.
Nginx SSL Settings
Once this is set up I was able to click on the source names in the Proxy Hosts list and open up the associated web page. Now this is setup, I can open JellyFin through Finamp, and now all my music on my phone.
