A short guide to get Sonarr and Radarr working to pass “HTTP Basic credentials” working on my Unraid setup.
Asuming your setup was following the Traefik Forward Auth - Single Applications guide
the middleware in “fileConfig.yml” needs to be ammended to have “authorization” at the end of authResponseHeaders.
        authResponseHeaders:
          - X-authentik-username
          - X-authentik-groups
          - X-authentik-email
          - X-authentik-name
          - X-authentik-uid
          - X-authentik-jwt
          - X-authentik-meta-jwks
          - X-authentik-meta-outpost
          - X-authentik-meta-provider
          - X-authentik-meta-app
          - X-authentik-meta-version
          - authorization
Authentication setup was using this guide
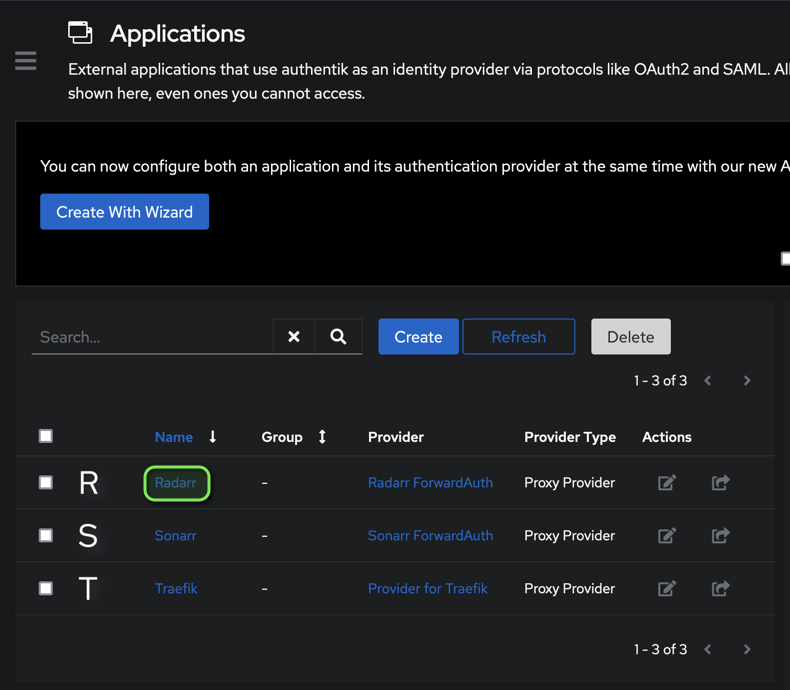
the second missing setp for me was adding group access to the application.
On the Admin page, under Applications>Applications, click the Application name (NOT Edit)
Select “Policy/Group/User Bindings” tab
then “Bind exisiting policy/group/user” and select the group you created earlier containing your Radarr Users
thanks for sharing the updates.
To configure multiple middlewares in Traefik on Unraid, you can use a chain middleware approach.
@alextrical
To combine multiple middlewares in Traefik, you can use the chain middleware feature. This allows you to apply multiple middleware configurations to a single router.
Syntax for Combining Multiple Middlewares
-
Define Each Middleware: First, define each middleware separately using labels in your Docker configuration. For example:
labels:
  - "traefik.http.middlewares.auth@file"
  - "traefik.http.middlewares.theme@file"
-
Create a Chain Middleware: Then, create a new chain middleware that includes the individual middlewares you want to combine. Use a comma to separate them:
labels:
  - "traefik.http.middlewares.my-chain.chain.middlewares=auth@file,theme@file"
-
Apply the Chain Middleware to a Router: Finally, apply this chain middleware to your router:
labels:
  - "traefik.http.routers.my-router.middlewares=my-chain@file"
Example Configuration
Here’s an example of how this might look in a Docker Compose file:
version: '3'

services:
  my-service:
    image: my-image
    labels:
      - "traefik.enable=true"
      - "traefik.http.routers.my-router.rule=Host(`example.com`)"
      - "traefik.http.middlewares.auth.basicauth.users=user:password"
      - "traefik.http.middlewares.theme.customheader.X-Theme=dark"
      - "traefik.http.middlewares.my-chain.chain.middlewares=auth@file,theme@file"
      - "traefik.http.routers.my-router.middlewares=my-chain@file"
Key Points
- Comma Separation: Ensure that you separate multiple middlewares with a comma within the chain definition.
- Unique Names: Each middleware should have a unique name to avoid conflicts.
- Testing: After setting up, verify that all middlewares are functioning correctly by checking the Traefik dashboard.
To set up Traefik to allow internal-only access to certain sites, you can use the IPWhitelist middleware (now known as IPAllowList). This middleware allows you to limit access based on client IP addresses.
- Define the IPAllowList Middleware: Create a dynamic configuration file (e.g.,
dynamic.yaml) and define the IPAllowList middleware with the allowed IP ranges.
http:
  middlewares:
    internal-only:
      ipAllowList:
        sourceRange:
          - "192.168.0.0/16"  # Replace with your internal IP range
          - "10.0.0.0/8"      # Replace with your internal IP range
- Apply the Middleware to Your Routers: In your
docker-compose.yml or Traefik configuration file, apply the middleware to the routers for the services you want to restrict to internal access.
services:
  code:
    labels:
      - "traefik.http.routers.code.rule=Host(`code.domain.tld`)"
      - "traefik.http.routers.code.entrypoints=web"
      - "traefik.http.routers.code.middlewares=internal-only@file"

  traefik:
    labels:
      - "traefik.http.routers.traefik.rule=Host(`traefik.domain.tld`)"
      - "traefik.http.routers.traefik.entrypoints=web"
      - "traefik.http.routers.traefik.middlewares=internal-only@file"

  mariadb:
    labels:
      - "traefik.http.routers.mariadb.rule=Host(`mariadb.domain.tld`)"
      - "traefik.http.routers.mariadb.entrypoints=web"
      - "traefik.http.routers.mariadb.middlewares=internal-only@file"
- Mount the Dynamic Configuration File: Ensure that the dynamic configuration file is mounted in your Traefik container.
services:
  traefik:
    volumes:
      - "./dynamic.yaml:/etc/traefik/dynamic.yaml"
- Update Your Traefik Configuration: Update your Traefik static configuration to include the dynamic configuration file.
providers:
  file:
    filename: /etc/traefik/dynamic.yaml