GitHub is possibly the most popular version control hosting provider for Git in the market and many of us use it almost every single day in our lives. In addition to interacting with a remote repository via HTTPS, we also have the option of using a more secure, and frankly, in my personal opinion, more convenient means via Secure Shell (SSH).
In this short write up, I will do my best to carefully lay out the means to set up your GitHub access on a cloudpanel server that runs a Linux distribution such as Ubuntu, be it a VPS (Virtual Private Server) or a VDS(Virtual Dedicated Server) that you may have the opportunity to use in your development work.
Check for updates and Git
First of all, make sure that you should have the root priviledges on the machine, if you’re performing these steps.
On Ubuntu, the one liner to get and install updates on the system is:
$ sudo apt-get update
Let the command run for a bit, and if it shows you have upgradable packages as well, you can also do: sudo apt-get upgrade, but let’s not go into that detail here, and move to the next step.
Great! Now’s the time to check for the presence of git on your system:
$ git --version
If it isn’t installed (it is pre-installed on most VPS providers I’ve worked with, but you never know), you can also install it using:
$ sudo apt-get install git
Now that the easy part is over, let’s go over the next eas— ier part. Yes, the next part is also not that difficult! ![]()
Configuring SSH keys for GitHub
Since you’ll be using Github, having an account with Github is of course, a given. If you don’t have one yet or need to make a new one for any reason, do that now before moving ahead.
This is how you generate new ssh keys on your system:
$ ssh-keygen -t rsa -b 4096 -C "your github email address"
This briefly means that we are using the ssh-keygen tool to use the rsa encryption with 4096-bit keys as our host SSH keys.
Also, make sure to substitute your email address associated with your first GitHub account in the placeholder above.
Now, on the prompt in the terminal, make sure to enter the full path of the file where you want to save the new ssh key. For example, ~/.ssh/id_rsa_github.ssh can be a path for your GitHub account ssh key.
You can choose to enter a passphrase or not by leaving the field blank and pressing return(enter).
There you have it! Your public and private SSH keys have now been created!
Let’s activate this key now as well, shall we?
ssh-add ~/.ssh/id_rsa_github.ssh
Great job! Now, the only step remaining is to associate this SSH key with your GitHub account.
Go to the .ssh folder and print the public key you just created in the terminal, then simply copy it:
$ cd ~/.ssh
$ cat id_rsa_github.ssh
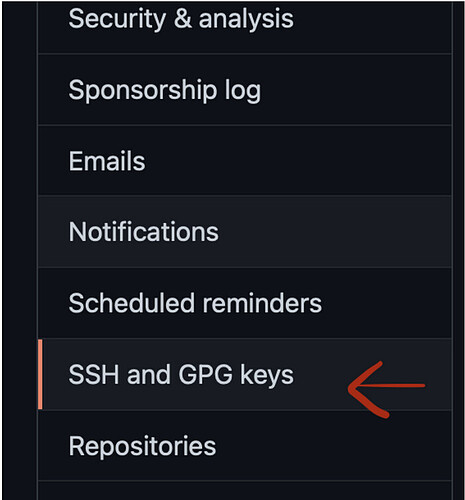
Finally, go to your GitHub settings pane, and in this section about SSH keys, create a new key and paste your public key there:
GitHub settings pane
Awesome, that’s a job well done!
You can now start using remote GitHub repositories on your cloudpanel.
