Securing Your Server with Tailscale: A Complete Guide
Want to secure your CloudPanel server and restrict access to only authorized users? We’ll walk you through using our automated script that sets up Tailscale and configures all necessary security settings. The best part? You only need to perform one manual step - authenticating with Tailscale through your browser.
What the Script Does
Our script automates the following:
- System updates and required package installation
- Tailscale installation and configuration
- SSH security hardening
- CloudPanel access restriction
- Firewall rules setup
- Database configuration for CloudPanel
- Backup creation of all important configurations
Prerequisites
Before you begin, ensure you have:
- A server running Ubuntu/Debian Cloudpanel
- Root or sudo access to your server
- A Tailscale account (free or paid)
Getting and Running the Script
- Download the setup script:
wget https://git.hhf.technology/hhf/cloudpanel-tailscale/raw/branch/main/setup-tailscale.sh
- Make the script executable:
chmod +x setup-tailscale.sh
- Run the script as root or with sudo:
sudo ./setup-tailscale.sh
The Authentication Step
![]() IMPORTANT: Manual Action Required
IMPORTANT: Manual Action Required ![]()
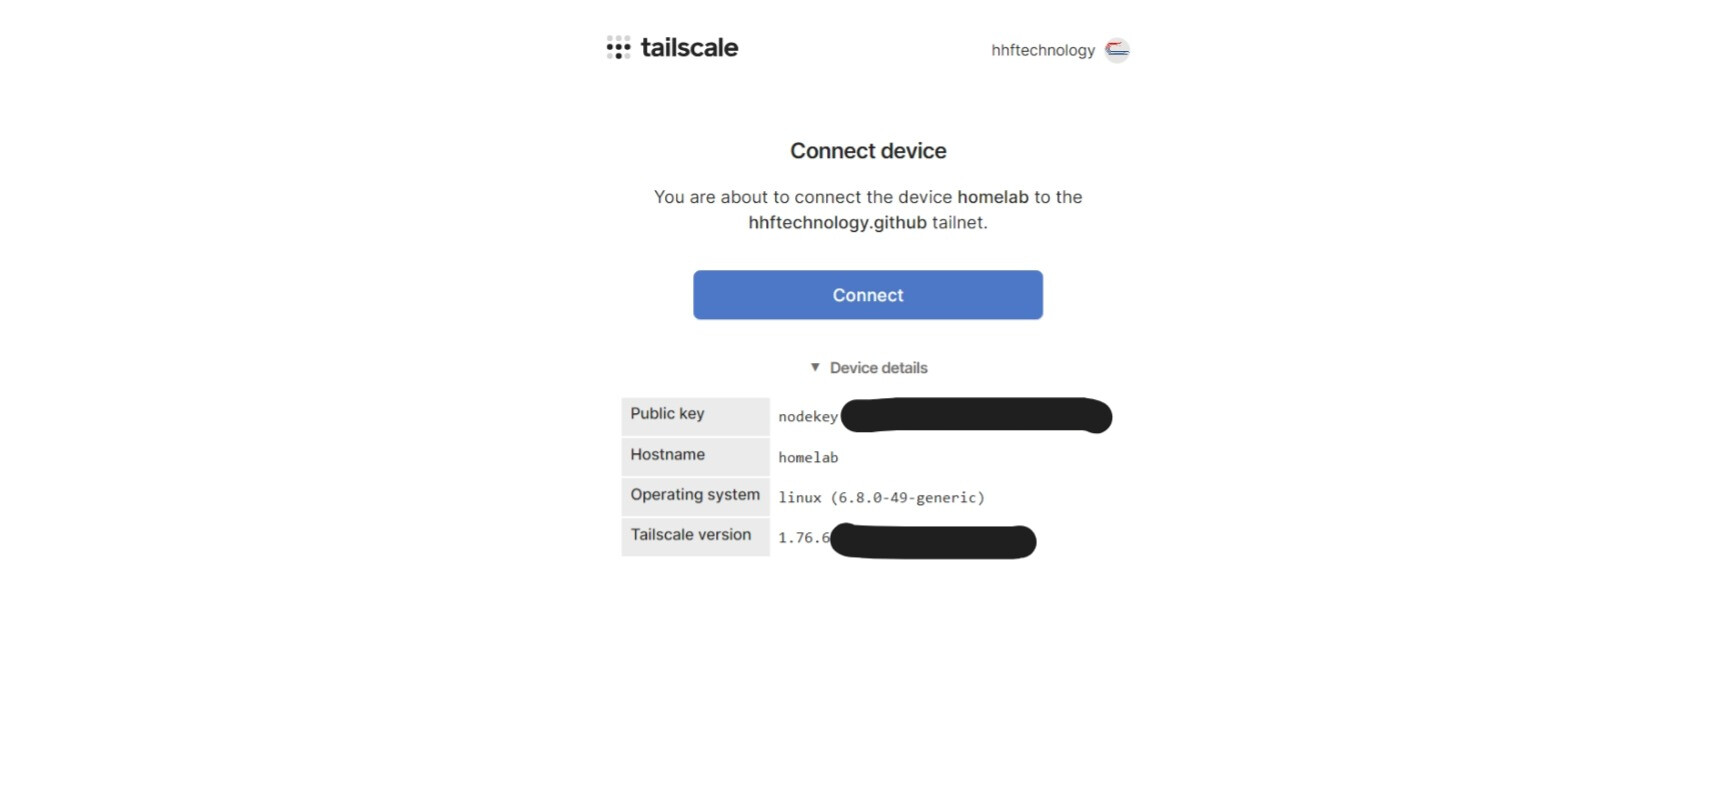
During script execution, you’ll reach a point where Tailscale needs authentication. Here’s what happens:
- The script will display a URL in your terminal
- You must copy this URL and paste it into your browser
- Log in to your Tailscale account if prompted
- Approve the device access
- The script will automatically continue once authentication is complete
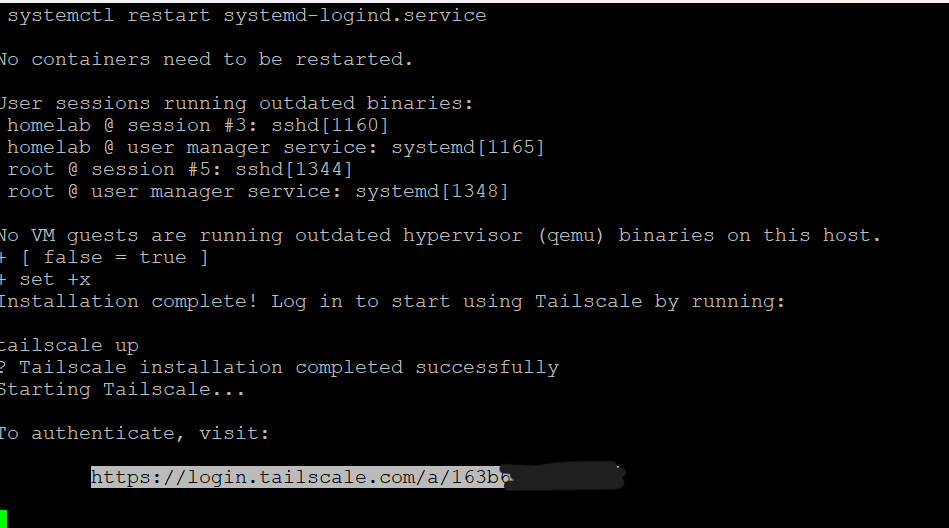

This is the only manual step required during the entire setup process.
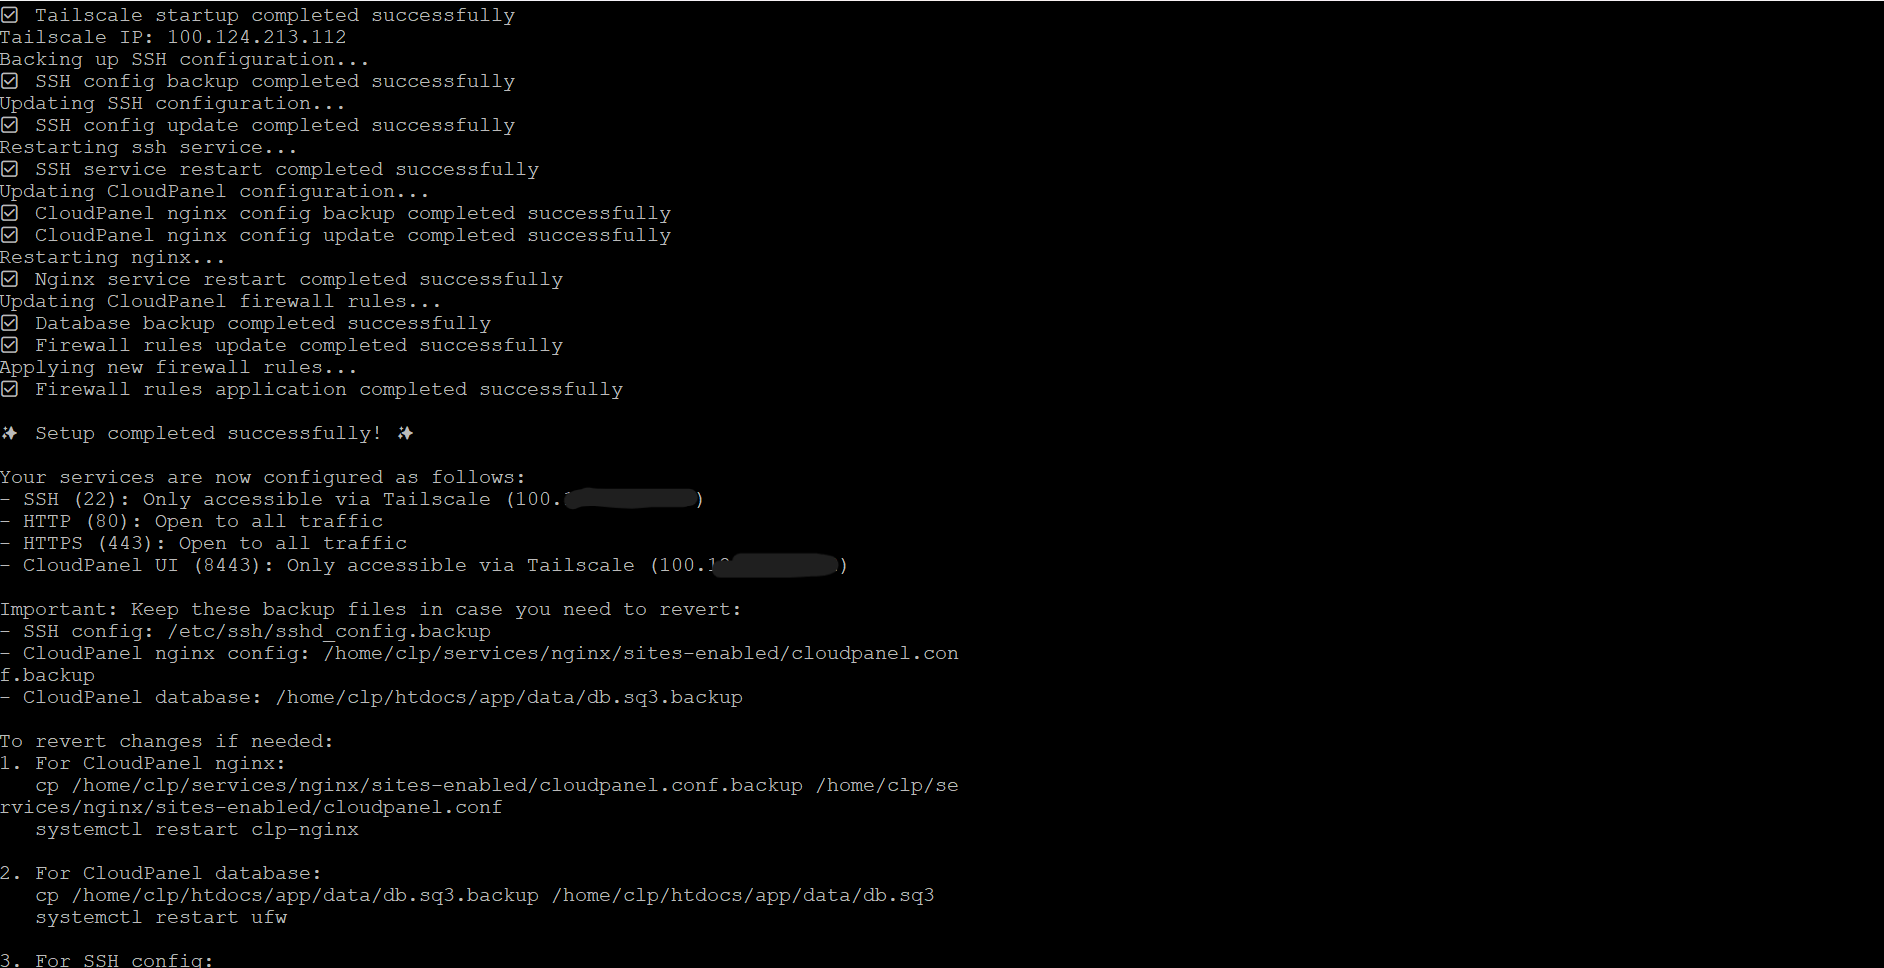
What Gets Configured
After running the script, your server will be configured with:
- SSH (Port 22): Only accessible via Tailscale
- HTTP (Port 80): Open to all traffic
- HTTPS (Port 443): Open to all traffic
- CloudPanel UI (Port 8443): Only accessible via Tailscale
Backup and Recovery
The script automatically creates backups of all modified configurations:
- SSH config:
/etc/ssh/sshd_config.backup - CloudPanel nginx config:
/home/clp/services/nginx/sites-enabled/cloudpanel.conf.backup - CloudPanel database:
/home/clp/htdocs/app/data/db.sq3.backup
To restore any configuration, use the commands provided in the script’s output summary.
![]() IMPORTANT: Before accessing the IP you will have to install tailescale client as shown in NEXT STEP Below
IMPORTANT: Before accessing the IP you will have to install tailescale client as shown in NEXT STEP Below ![]()
Both client on you machine and your VM should show connect before accessing the IP.

Post-Installation Verification
After the script completes:
- Don’t close your current session until you verify access
- Open a new terminal window
- Try connecting to your server using the Tailscale IP:
ssh user@[your-tailscale-ip] - Try accessing CloudPanel through your browser:
https://[your-tailscale-ip]:8443
Troubleshooting
If you can’t connect after setup:
- Ensure you’re connected to Tailscale on your local machine
- Check your Tailscale IP with:
tailscale ip -4 - If needed, restore from backups using the commands provided in the script’s output
Maintenance
The script configures everything for secure operation, but you should:
- Regularly update your system with
sudo apt update && sudo apt upgrade - Monitor Tailscale status with
tailscale status - Keep your Tailscale account secure (use 2FA if available)
Need Help?
If you encounter any issues:
- Check the script output for any error messages
- Verify your Tailscale connection status
- Ensure all services are running:
systemctl status sshd nginx ufw
Remember: The script creates comprehensive backups, so you can always restore your original configuration if needed.
Next Step
Accessing CloudPanel via Tailscale: User Client Install Guide
Overview
This guide will help you set up Tailscale on your local machine to access CloudPanel’s admin interface securely. Tailscale creates a secure, encrypted connection between your computer and the server.
Step 1: Create a Tailscale Account
- Visit https://login.tailscale.com/start
- Click “Sign in” and choose any of these options:
- Google account
- Microsoft account
- GitHub account
- Email-based signup
Step 2: Install Tailscale Client
For Windows Users
- Download the installer:
- Visit https://tailscale.com/download/windows
- Click “Download Tailscale for Windows”
- Install Tailscale:
- Run the downloaded
.exefile - Follow the installation wizard
- When prompted, allow the application to make changes to your device
- Run the downloaded
- Log in to Tailscale:
- Click the Tailscale icon in your system tray (bottom-right corner)
- Click “Log in”
- Your default browser will open to complete authentication
- Authorize the device when prompted
For macOS Users
-
Install via the App Store (Recommended):
- Open the App Store
- Search for “Tailscale”
- Click “Get” or the download icon
OR Install via Homebrew:
brew install --cask tailscale -
Launch Tailscale:
- Find Tailscale in your Applications folder or use Spotlight (Cmd + Space)
- Click the Tailscale icon in your menu bar (top-right)
- Click “Log in”
- Your default browser will open to complete authentication
- Authorize the device when prompted
For Linux Users
Ubuntu/Debian:
# Add Tailscale's package signing key and repository
curl -fsSL https://pkgs.tailscale.com/stable/ubuntu/jammy.noarmor.gpg | sudo tee /usr/share/keyrings/tailscale-archive-keyring.gpg >/dev/null
curl -fsSL https://pkgs.tailscale.com/stable/ubuntu/jammy.tailscale-keyring.list | sudo tee /etc/apt/sources.list.d/tailscale.list

# Install Tailscale
sudo apt-get update
sudo apt-get install tailscale

# Start and log in to Tailscale
sudo tailscale up
Fedora/RHEL:
# Add repository
sudo dnf config-manager --add-repo https://pkgs.tailscale.com/stable/fedora/tailscale.repo

# Install Tailscale
sudo dnf install tailscale

# Start and log in to Tailscale
sudo tailscale up
Step 3: Accessing CloudPanel
-
After installing and logging into Tailscale, your device will be connected to your private Tailscale network.
-
To access CloudPanel:
- Open your web browser
- Enter the Tailscale IP address of your server with port 8443:
https://[TAILSCALE_IP]:8443 - Replace [TAILSCALE_IP] with the actual Tailscale IP address provided by your server administrator
- Accept the SSL certificate warning (if any)
-
You can now log in to CloudPanel using your credentials.
Troubleshooting
Can’t Connect to CloudPanel?
-
Verify Tailscale is running:
- Windows: Check the system tray icon
- macOS: Check the menu bar icon
- Linux: Run
sudo tailscale status
-
Verify you’re connected:
ping [TAILSCALE_IP] -
Check Tailscale status:
tailscale statusThis will show all devices in your network and their connection status.
-
Common Issues:
- SSL Certificate Warning: This is normal when accessing via IP address. You can safely proceed.
- Connection Timeout: Ensure your firewall isn’t blocking Tailscale connections
- Authentication Failed: Double-check your Tailscale login status
Still Having Problems?
- Check if Tailscale is running on both your machine and the server
- Ensure you’re using the correct Tailscale IP address
- Contact your server administrator for assistance
Security Notes
- Keep your Tailscale client updated
- Never share your Tailscale credentials
- Use device authentication when prompted
- For additional security, enable 2FA on your Tailscale account