Networking Basics in Linux: IP, Ports, and Routing
We’ll break down three core concepts in Linux networking: IP addresses, ports, and routing.
1. Understanding IP Addresses
An IP (Internet Protocol) address is a unique identifier assigned to devices connected to a network. It allows computers to locate and communicate with each other over an IP-based network, such as the Internet or a local network.
There are two types of IP addresses:
- IPv4: Consists of four octets (numbers between 0–255), for example,
192.168.1.1. - IPv6: A more recent version designed to replace IPv4, as IPv4 addresses are running out. IPv6 addresses are longer, such as
2001:0db8:85a3:0000:0000:8a2e:0370:7334.
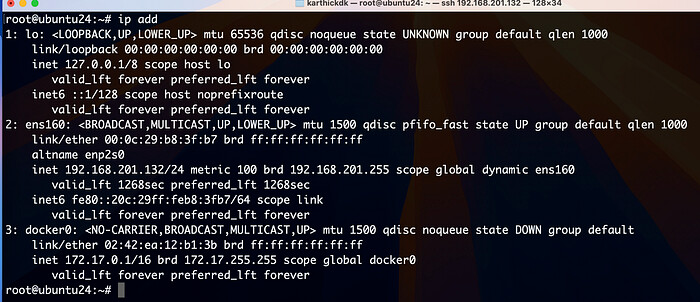
In Linux, to check the IP addresses of network interfaces, you can use the following command:
ip a
or
apt install net-tools

ifconfig
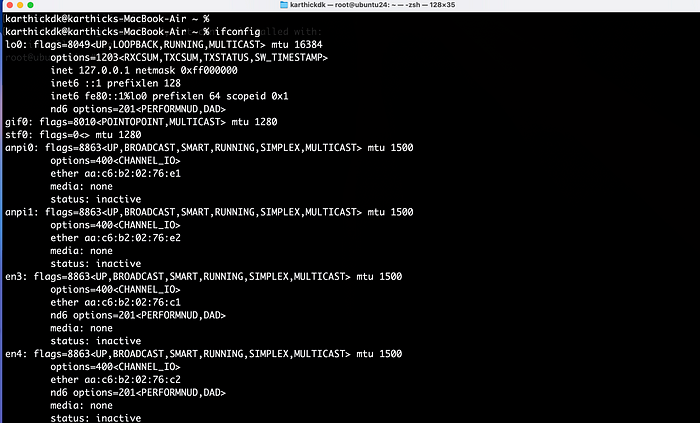
This will list all available network interfaces and their corresponding IP addresses.
Key Points:
- Public IP: Routable on the internet, unique worldwide.
- Private IP: Used within local networks, not routable on the internet (e.g.,
192.168.x.x). - Loopback Address: The special address
127.0.0.1is used to refer to the local machine itself.
2. Network Troubleshooting
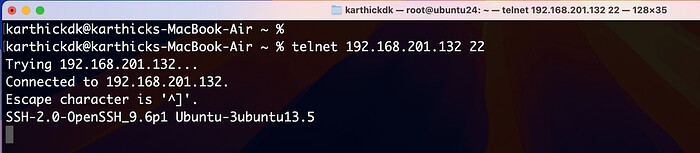
With Telnet
To check whether the specific port is connecting to a remote host.
This command attempts to connect to port 22 on 192.168.201.132. If the port is open, you’ll see a success message; otherwise, it will fail.
telnet 192.168.201.132 22
With nc (Netcat)
Netcat (nc) is the Swiss Army knife of networking utilities. It can establish raw network connections, listen for incoming connections, and even act as a port scanner.
Example Use Case: Testing Open Ports
To check if a particular port is open on a remote server:
nc -zv 192.168.201.132 22

This command attempts to connect to port 22 on 192.168.201.132. If the port is open, you’ll see a success message; otherwise, it will fail.
You can also use nc to create simple network servers and clients, making it a great tool for testing services.
3. Ports: Communication Endpoints
Ports are logical communication endpoints, allowing multiple services to use the same IP address while distinguishing between them.
In Linux, ports are often categorized into:
- Well-Known Ports: Range from
0to1023. These are reserved for core services (e.g., HTTP uses port80, SSH uses port22). - Registered Ports: Range from
1024to49151. These are available for various user services and applications. - Dynamic/Private Ports: Range from
49152to65535. These are used for temporary or private connections.
To view open ports and listening services, you can use tools like:
sudo netstat -tuln
or
ss -tuln
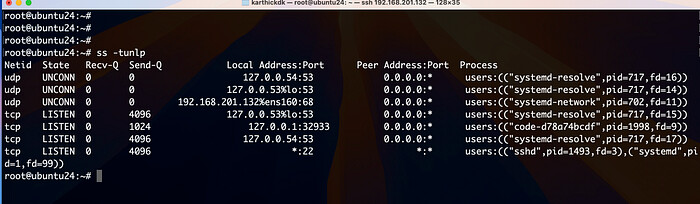
Example output from ss -tuln:
Netid  State   Recv-Q   Send-Q     Local Address:Port      Peer Address:Port
tcp    LISTEN  0        128        0.0.0.0:22              0.0.0.0:*
tcp    LISTEN  0        100        127.0.0.1:3306          0.0.0.0:*
In this example:
0.0.0.0:22shows SSH listening on port22.127.0.0.1:3306shows MySQL listening on the loopback address127.0.0.1on port3306.
Key Points:
- Ports allow multiple services to operate simultaneously on a single IP.
- Secure communication often involves specifying a port (e.g.,
ssh user@server -p 2222).
4. Routing: How Linux Handles Traffic
Routing determines how data packets travel from one machine to another across a network. In Linux, routing tables direct this traffic, showing where packets should be sent based on their destination IP address.
To view the routing table in Linux, you can use:
ip route show
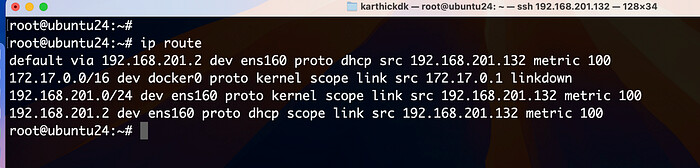
or
route -n
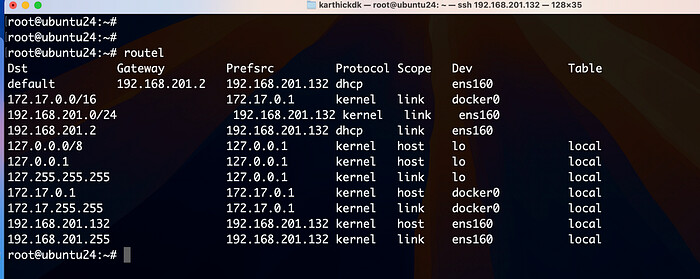
An example routing table:
Kernel IP routing table
Destination     Gateway         Genmask         Flags   Metric Ref    Use Iface
0.0.0.0         192.168.1.1     0.0.0.0         UG      100    0        0 eth0
192.168.1.0     0.0.0.0         255.255.255.0   U       0      0        0 eth0
Explanation:
- The default route (
0.0.0.0/0ordefault) directs all outbound traffic to a gateway (192.168.1.1in this case), which typically is your router. - Specific routes (
192.168.1.0/24) show how traffic is routed within your local network.
You can manually add routes with:
sudo ip route add 192.168.2.0/24 via 192.168.1.1
This command tells the system to send packets destined for 192.168.2.0/24 via the gateway 192.168.1.1.
Key Points:
- Default gateways manage outbound traffic.
- Linux uses routing tables to decide how to handle packets.
5. Advanced Routing and Policy with iproute2
The iproute2 suite provides tools for advanced networking. One of its key features is policy-based routing, which allows you to create routing tables based on source addresses, marking traffic for specific routes, and other advanced features.
For example, to create a new routing table and add routes:
echo "200 custom_table" >> /etc/iproute2/rt_tables
sudo ip route add 192.168.10.0/24 via 192.168.1.254 table custom_table
sudo ip rule add from 192.168.1.10/32 table custom_table
This creates a custom routing table and defines rules for how traffic from a specific IP should be routed.
6. Managing Firewalls with UFW
A firewall controls the flow of network traffic, allowing or denying access based on a set of rules. In Linux, you typically have two options: UFW (Uncomplicated Firewall) and firewalld.
UFW: A Simpler Approach
UFW is a user-friendly front-end for iptables and is available on Ubuntu and Debian-based distributions. It allows for quick configuration of firewall rules.
To enable UFW and allow SSH traffic (port 22):
sudo ufw enable
sudo ufw allow ssh
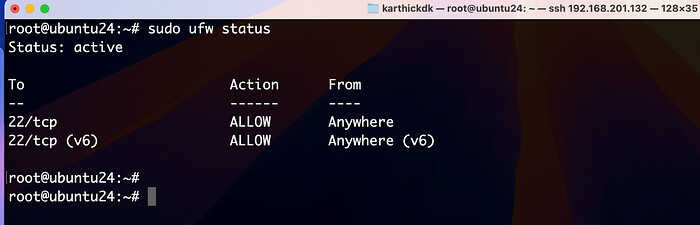
check the status and rules:
sudo ufw status verbose
7. firewalld: Dynamic and Zone-Based Firewalling
firewalld is a dynamic firewall manager widely used in Red Hat-based distributions like Fedora and CentOS. It offers zone-based firewalling and allows runtime changes without needing to restart firewall services, making it highly flexible for both desktop and server environments.
Zones and Interfaces
A unique feature of firewalld is the concept of zones. Zones define different trust levels for network interfaces and provide a set of predefined firewall rules. For example, a laptop connected to both the office network and a public Wi-Fi can assign its wired interface to a “trusted” zone and the wireless interface to a more restrictive “public” zone.
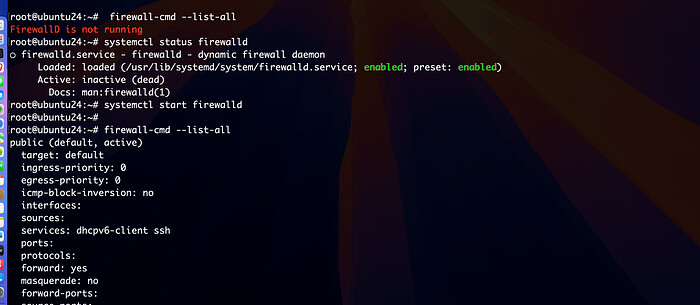
# To check the status of the service
systemctl status firewalld

# Start the service
systemctl status firewalld

# show firwall rules
firewall-cmd --list-all
To assign a zone to a network interface:
sudo firewall-cmd --zone=public --add-interface=wlp3s0 --permanent
This assigns the wireless interface wlp3s0 to the public zone, applying the firewall rules defined for that zone.
Rich Rules: Granular Firewall Control
While basic rules in firewalld are sufficient for many cases, rich rules allow for more advanced configurations, such as defining rules based on ports, IP addresses, protocols, logging, and more.
Example: Allowing SSH from a specific IP
sudo firewall-cmd --permanent --zone=public --add-rich-rule='rule family="ipv4" source address="192.168.1.100" service name="ssh" accept'
This rich rule allows SSH connections only from the IP 192.168.1.100, enhancing security by restricting SSH access to a specific trusted source.
Runtime Changes and Persistence
One of the biggest advantages of firewalld over other firewall management tools is the ability to make runtime changes. These changes are applied immediately without restarting the firewall service and disrupting ongoing connections.
To make a temporary change, such as opening port 8080 for HTTP traffic:
sudo firewall-cmd --add-port=8080/tcp
This rule will persist only until the system reboots or the firewall reloads. To make the change permanent:
sudo firewall-cmd --add-port=8080/tcp --permanent
sudo firewall-cmd --reload
8. Port Forwarding with Firewalld
Use Case Scenario:
Let’s say you’re running a syslog server that listens on port 5514 for internal logging. However, your external clients (e.g., other servers or devices) are configured to send logs to port 514. With this command, you can forward traffic from port 514 (commonly used by syslog clients) to port 5514 internally, avoiding the need to change the configuration on your internal syslog server.
# Forward TCP Port
firewall-cmd --zone=public --add-forward-port=port=514:proto=tcp;toport=5514 --permanent

# Forward UDP Port
firewall-cmd --zone=public --add-forward-port=port=514:proto=udp;toport=5514 --permanent
--zone=public: Specifies the firewall zone (publicin this case) where the rule will be applied. Thepubliczone is used for networks where the system is accessible by other devices but with more restrictive rules.--add-forward-port: Tells the firewall to add a port-forwarding rule.port=514: This is the source port (514) that the firewall will listen to for incoming connections.proto=tcp: Specifies the protocol to be used (TCP).toport=5514: Specifies the destination port (5514) where the traffic will be forwarded.--permanent: Ensures that the rule remains after a firewall reload or system reboot.
In summary, this command forwards TCP traffic from port 514 to port 5514 within the public zone.
proto=udp: Specifies that UDP traffic from port514should be forwarded to port5514.
After adding these rules, you must reload the firewall for them to take effect:
firewall-cmd --reload
Combining iproute2 and firewalld
The real power of these tools comes when they are used in conjunction. For example, you can use iproute2 to route traffic from specific IP addresses through different gateways while using firewalld to enforce rules on these different traffic streams.
Consider a scenario where you have two ISPs and you want to route specific traffic (e.g., streaming) through ISP 1 while routing other traffic (e.g., web browsing) through ISP 2. You can define this using iproute2 and secure it with firewalld rich rules to ensure that only specific traffic is allowed through.
Conclusion
Networking in Linux is a vast and complex subject but with tools like ufw, ip, ss, nc, and iproute2, you have powerful ways to manage, monitor, and troubleshoot your network. Whether you’re setting up firewall rules, routing traffic, or inspecting active connections, Linux offers the flexibility and control needed for advanced networking setups.
With this foundational knowledge, you’re better equipped to manage Linux systems and ensure efficient network communication. Stay tuned for more in-depth topics as we continue our exploration of Linux networking.
Stay tuned for the next post in our Linux series, where we’ll dive into further advanced topics!
Happy networking!