Overview
This guide provides a comprehensive approach to securely exposing your services to the internet using a Virtual Private Server (VPS), Tailscale, and Caddy. This setup is particularly beneficial for users with Internet Service Providers (ISPs) like Starlink or T-Mobile, which do not assign publicly routable IP addresses. Additionally, it serves to protect your home IP from direct exposure, enhancing your overall security posture.
Important Considerations:
Exposing services to the internet inherently introduces risks. Any service that is accessible online can become a target for cyber attackers. Therefore, it is essential to carefully evaluate which services truly need to be exposed. To minimize risks:
- Limit exposure by ensuring that only essential services are publicly accessible.
- Regularly update your systems and software to safeguard against known vulnerabilities.
- For accessing home network services, consider using a VPN or Tailscale natively, as these solutions provide secure, encrypted connections that help mitigate unauthorized access and protect your network from potential threats.
Prerequisites
Before you begin, ensure you have the following:
- Tailscale Account: Sign up for a Tailscale account if you don’t already have one. The service is free and easy to set up.
- VPS with Public IP: Acquire a small VPS with a dedicated public IP address. A recommended configuration includes at least 1 CPU and 1GB of RAM running Ubuntu, typically costing between $5-$6 per month. Some reputable providers include:
- Digital Ocean
- Linode
- RackNerd
- Docker and Docker Compose: Install Docker and Docker Compose on your VPS. Refer to the official Docker documentation for installation instructions tailored to your chosen operating system.
- Self-Hosted Machine: Identify the device on your home network that you wish to expose to the web. If you plan to expose multiple services, consider utilizing the Tailscale subnet router feature.
Security Recommendations: It is advisable to familiarize yourself with VPS security best practices. Resources such as Rackspace’s documentation on Linux security can provide valuable insights. At a minimum, disable root login and password authentication on your VPS.
Steps
Install Tailscale
- Login to Your VPS: Use SSH to connect to your VPS.
- Install Tailscale: Follow the installation instructions available on the Tailscale website for Linux.
- Start Tailscale: Execute the command to start Tailscale. You will receive a unique URL prompting you to log in to your Tailscale account; paste this URL into your browser to add the device to your tailnet.
- Repeat Installation on Self-Hosted Machine: Perform the same steps on your self-hosted machine.
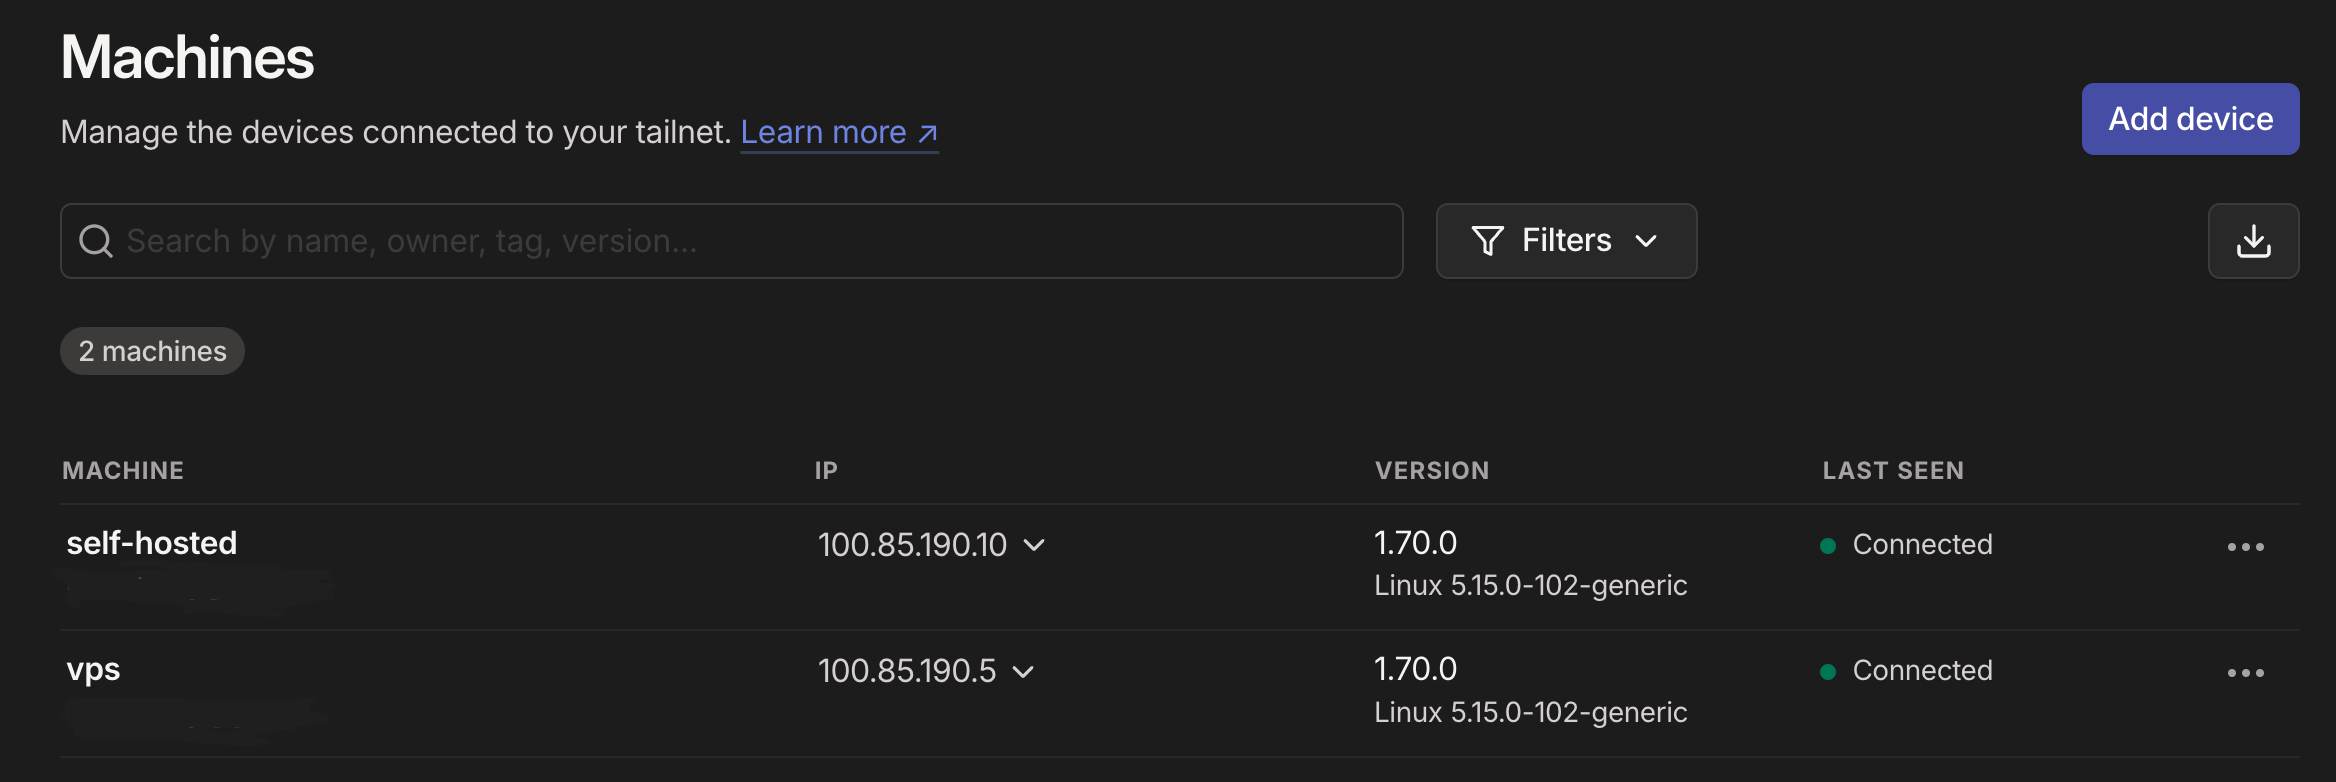
At this point, you should see two devices in your tailnet: the VPS and your self-hosted machine.
Advanced Configuration: If using a Tailscale subnet router, run
tailscale up --advertise-routes=192.168.1.0/24on your self-hosted machine (replace192.168.1.0/24with your home network’s CIDR range). Ensure IP forwarding is enabled and approve the route in the Tailscale admin console. On the VPS, runtailscale up --accept-routesto add your network range to its route table.
Point DNS to Your VPS
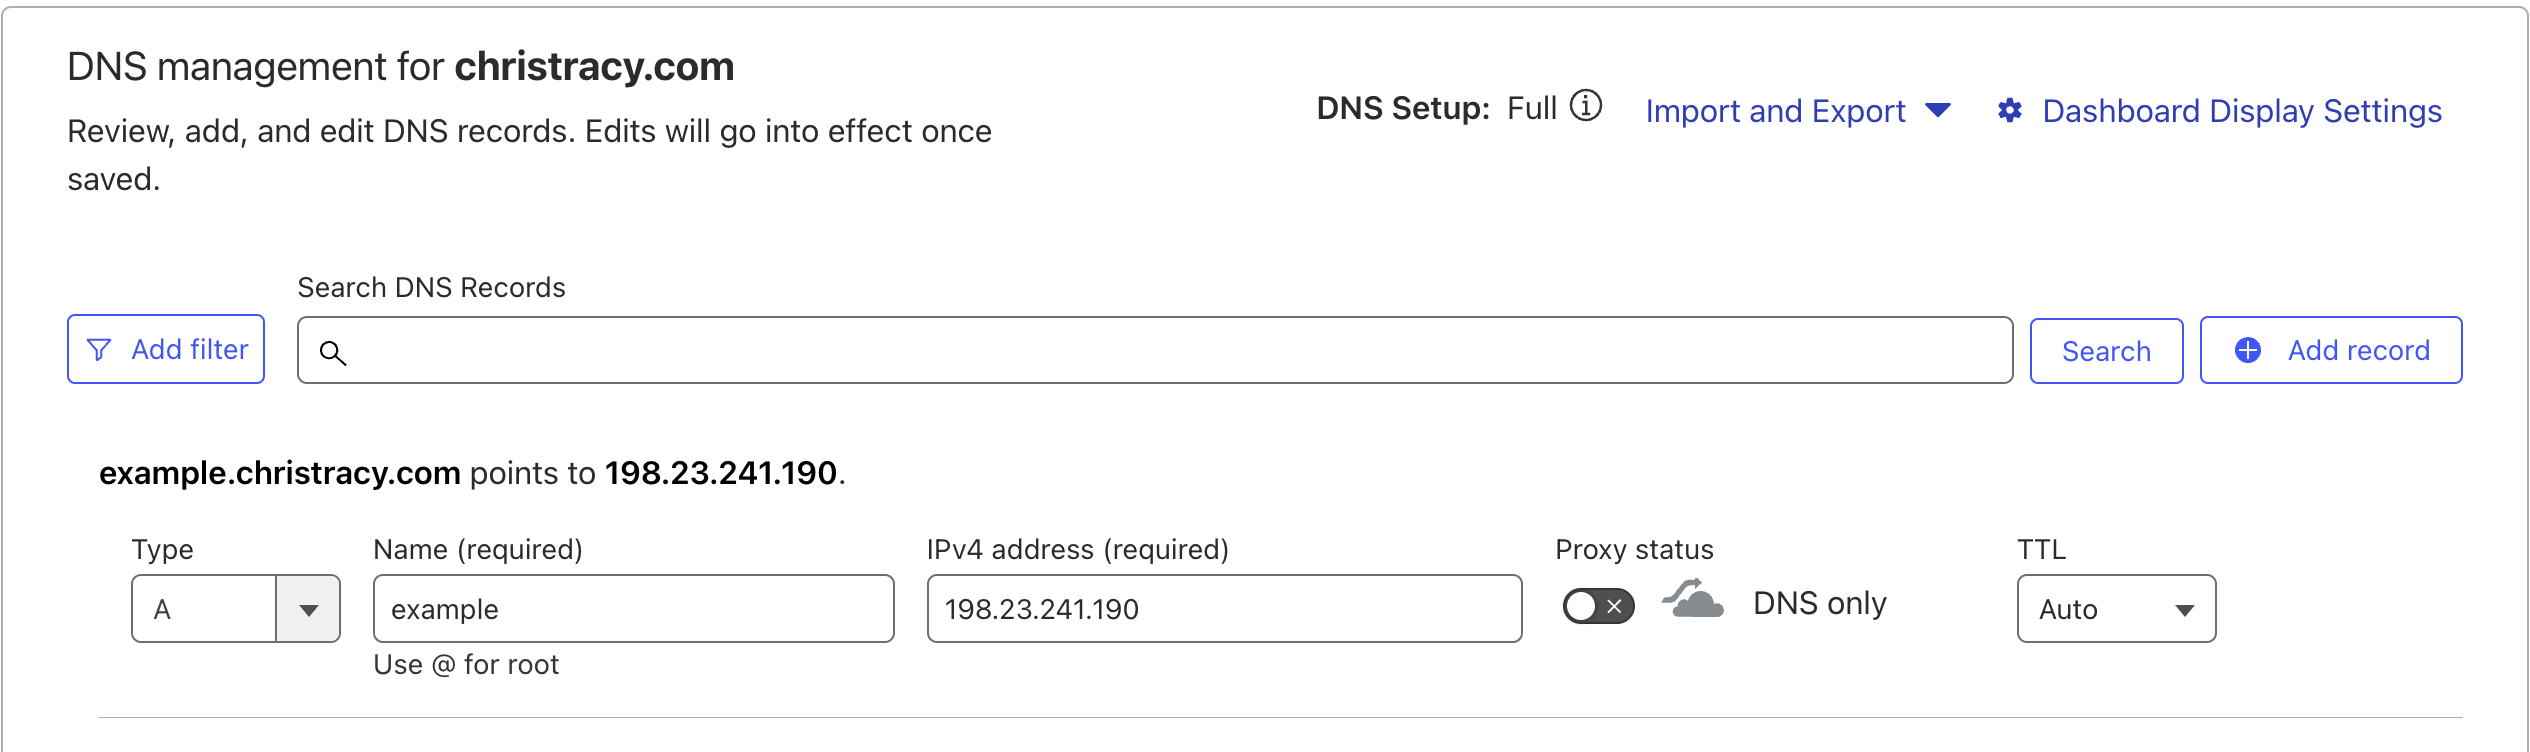
- Create A Record: Set up a new A record for your desired domain, pointing it to the public IP of your VPS. If using Cloudflare or another DNS provider, follow their specific instructions.
Set Up a Caddy Server
- Install Docker and Docker Compose: If not already done, install Docker and Docker Compose on your VPS.
- Create Caddyfile: On your VPS, create a Caddyfile in a designated directory:
nano /path/on/host/caddy_caddyFile/Caddyfile - Configure Caddyfile: Paste the following configuration into your Caddyfile, ensuring you update it according to your setup:
Replaceexample.christracy.com { reverse_proxy 100.85.190.10:80 }example.christracy.comwith your actual domain name and adjust the IP/port as necessary for the service you wish to expose (e.g., port 8123 for Home Assistant).
Advanced Configuration: If using a subnet router, use the machine’s default network IP instead of its Tailscale IP (e.g.,
reverse_proxy 192.168.1.10:80).
- Create Docker Compose File: Prepare a Docker Compose file with volume configurations:
version: "3.7" services: caddy: image: caddy:latest container_name: caddy_public restart: unless-stopped cap_add: - NET_ADMIN ports: - "80:80" - "443:443" - "443:443/udp" volumes: - /path/on/host/caddy_data:/data - /path/on/host/caddy_config:/config - /path/on/host/caddy_caddyFile:/etc/caddy # Update this path if changed earlier. - Run Docker Compose: Execute the following command in the terminal to start your Caddy container.
Test Your Setup
You should now be able to access your domain securely through a web browser with a valid SSL certificate in place.
Once configured, you can add servers located in different regions and use this VPS as a single entry point for all externally exposed services by adding new DNS records and updating your Caddyfile accordingly.
Optional Configuration
-
Implement ACL Rules in Tailscale: To enhance security further, consider setting up Access Control Lists (ACLs) in Tailscale that restrict which devices can communicate with each other based on their required ports.
Example ACL rule configuration:
"acls": [ { "action": "accept", "src": ["100.85.190.5"], "dst": ["100.85.190.10:80"] } ] -
Explore Deployment Automation: Check out guides on using GitHub Actions for deploying changes to your Caddyfile automatically while maintaining version control.
This guide aims to provide clear steps for securely exposing services while minimizing risks associated with internet exposure through thoughtful configuration and best practices in security management.