In this tutorial, we will use the Portainer web interface to manually create a MACVLAN that we can use later when starting a container.
I have already described how to set up Portainer for your Docker host in this Guide.
I recommend the use of MACVLAN only to advanced users, because for the implementation you should be familiar with the basics of "IP networks and have your own home network under control.
If terms like DHCP, gateway or subnet don’t mean anything to you, please get appropriate support. It is also helpful to get to grips with networking under Docker in advance. You can find information about this e.g. here:
Preparations for MACVLAN
And off we go. To implement the tutorial, you need knowledge of your own network, access to the Portainer interfac and console access (e.g. via SSH) to your Docker host.
In my example, I’m working on a Proxmox and using a 192.168.0.0/24 network as a testnet. The gateway is classically located on .1 and there is no DHCP area. My container should later get the IP address 192.168.0.100.
And off we go. Creating the MACVLAN network involves a total of two steps. In the first step, we create a “configuration” with the desired network information. In the second step, we then create the so-called “Creation” with the help of the “Configuration”, which we then later connect to the ioBroker container.
Hint
Up to and including Docker package version 17, it was not possible to create a “Creation” after creating the “Configuration” due to a bug on the DS.
However, you could connect the “Configuration” directly to the ioBroker container and have a working MACVLAN. I haven’t found an explanation for this, but it went smoothly for me for months. Nevertheless, I would recommend that when installing on a DS, the Docker package should be updated to the latest version beforehand.
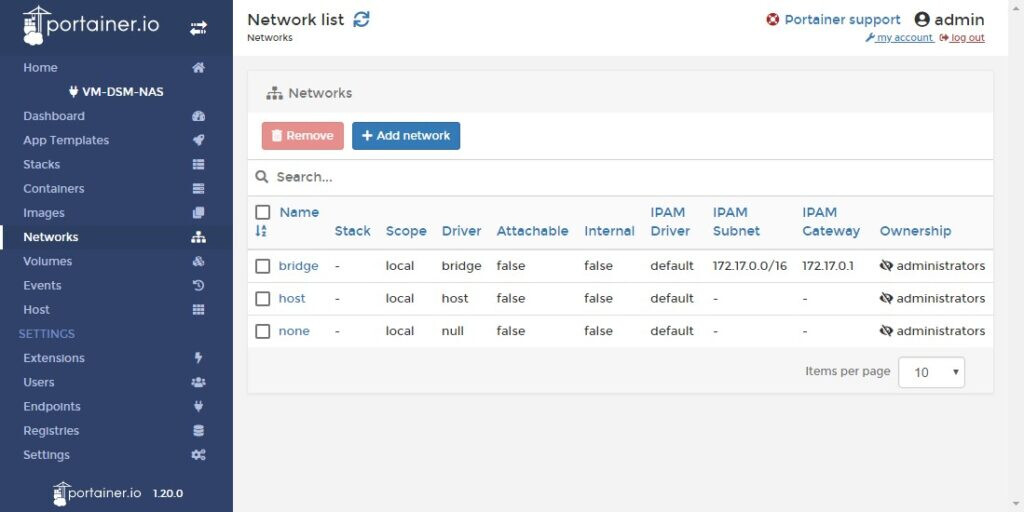
So let’s first open the Portainer web interface, log in and choose our endpoint (host). Then we start creating the “Configuration” by clicking on the “Add network” button under “Networks”.
In the following dialog, there are a few fields to fill. Let’s start with the name. I will only assign a single IP address to the MACVLAN. That’s why my MACVLAN gets a unique name. Because it’s the “Configuration”,
I’ll add a conf: iob\_public\_conf. Of course, we choose MACVLAN as the driver.
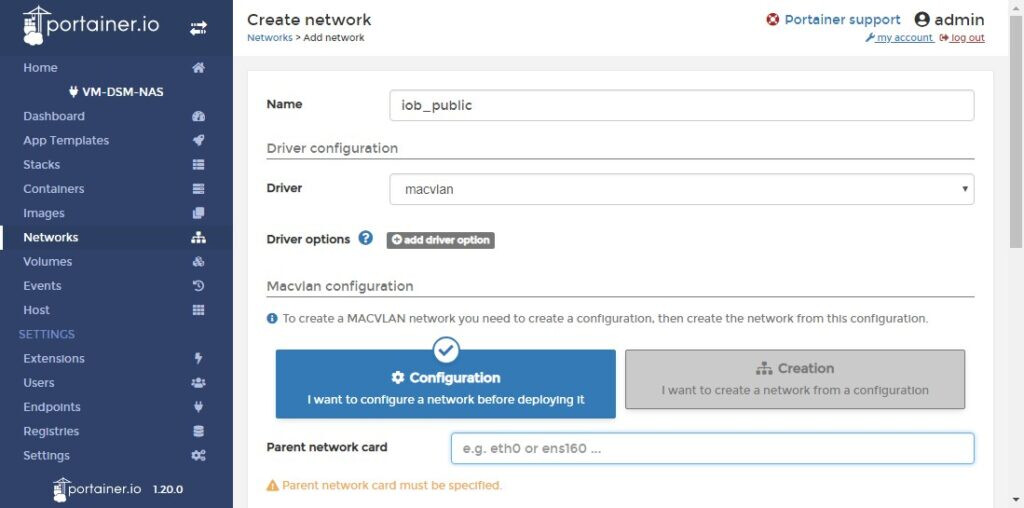
Continue to the next field: Parent network card. Here we have to specify which physical network card we want to bind our MACVLAN to. At this point, the assessment “for advanced users” is also justified. Because I don’t know of any way to elicit this information from the web interface of the DS so far. The only thing that helps is to get out the command line and “ifconfig” in.
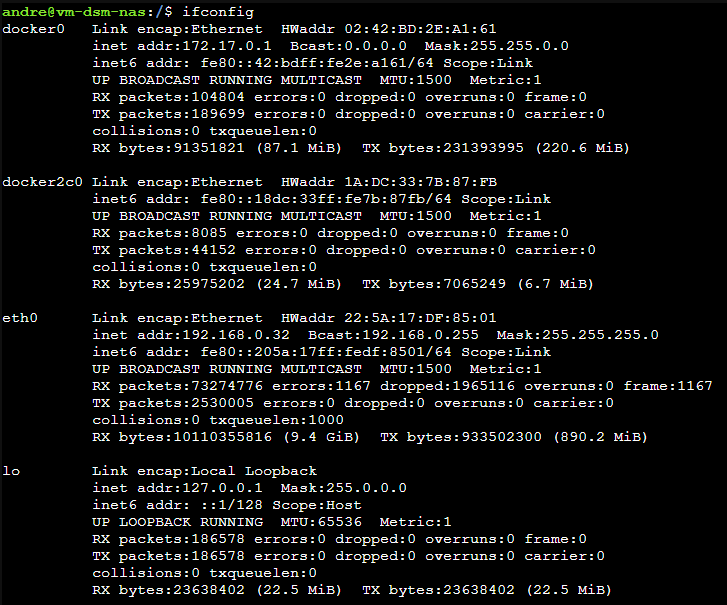
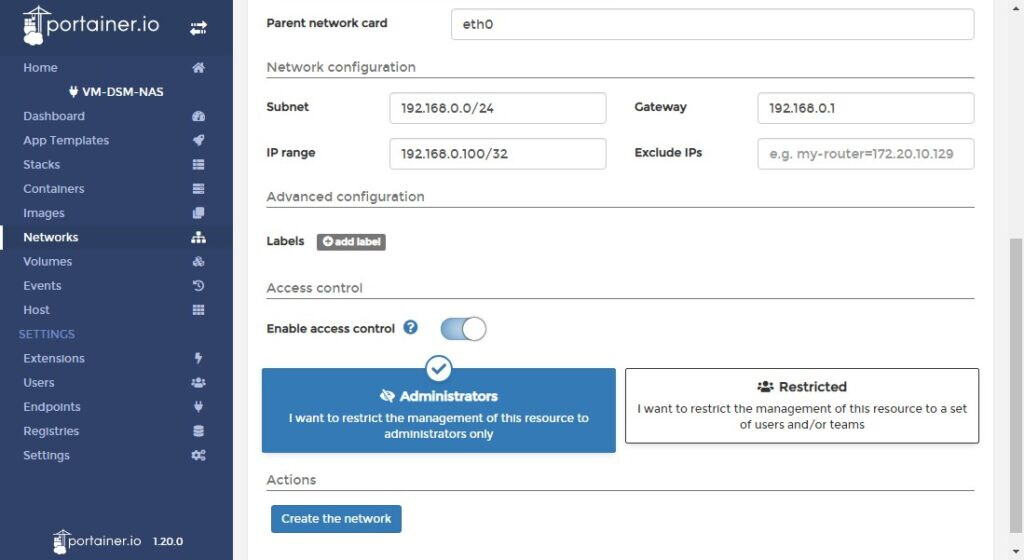
On my virtual test DS, the local IP address (192.168.0.32) is on the eth0 interface. So I’m using this.
I continue with the section “Network configuration” where I fill in the information according to my network. For “IP range” I use the desired IP address with a prefix length of “/32”. This network then contains exactly one IP address.
Hint
Of course, it is also possible to provide the MACVLAN with an entire address range via the prefix length, so that you can supply several containers in the MACVLAN with addresses.
For example, with 192.168.0.80/29 you have the addresses .81 to .86 available for containers.
However, you should think carefully about whether each container really needs its own IP address. In most cases (Webster, databases, etc.) this doesn’t make sense.
You can help you choose the network, e.g. the network computer from Heise.
Attention: To avoid IP conflicts in your network, please make sure that the selected area is NOT managed/can be assigned by a DHCP server!
I use the “Create the network” button to complete the creation of the “Configuration”.
The created “Configuration” should now appear in the list of networks.
The “Creation” is still missing. To create these, we click on the “Add network” button again and enter a network name. This time we only use “iob_public” and select “MACVLAN” as the “driver” again. Then we click on the “Creation” button and select our “Configuration” in the “Configuration” drop-down menu.
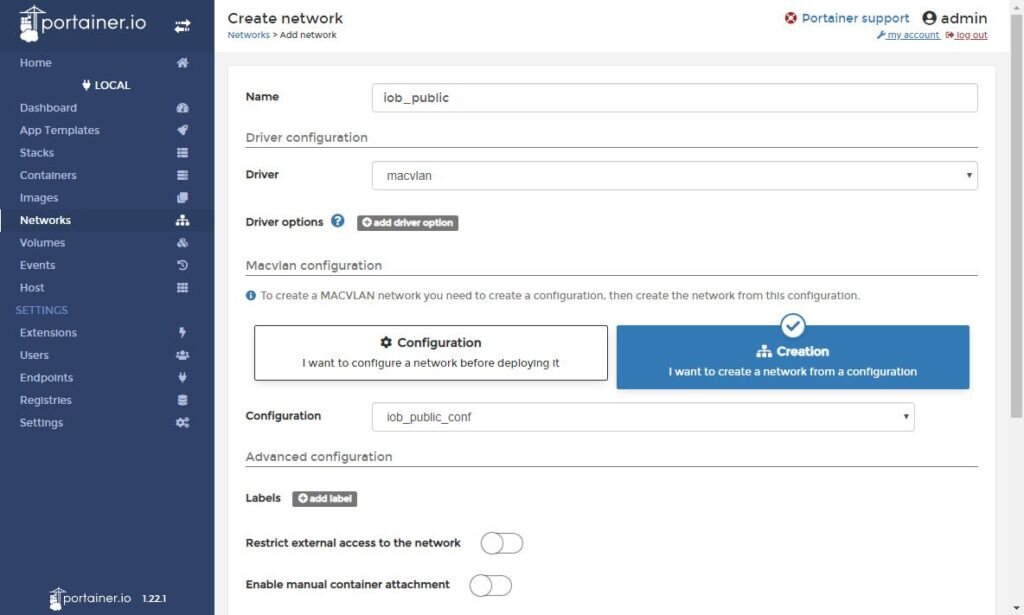
Using the “Create the network” button, we now complete the creation of the “Creation”. The new network appears in the list and is ready to use.
Implementation with docker-compose aka “Portainer Stacks”…
Of course, the creation of the MACVLAN can also be mapped in docker-compose. In Portainer, the whole thing is called “Stacks”. If you haven’t heard of it yet, you can [read on here Guides & Tutorials]. For everyone else, I have the example explained above as a definition for the stack file. The name of the network in the example is “public”.
networks:
 public:
   driver: macvlan
   driver_opts:
     parent: eth0
   ipam:
     config:
       - subnet: 192.168.0.0/24
         gateway: 192.168.0.1
         ip_range: 192.168.0.100/32
         aux_addresses:
           net-address: 192.168.0.100
In the corresponding container, the whole thing is then referenced as follows, including the IP address for the container.
networks:
  public:
    ipv4_address: 192.168.0.100
In my opinion, questions should always be asked and answered publicly, so that other users with the same question can access the answers.