In this, we will check How to configure the Ubuntu server edition to Ubuntu GUI for the Production Jump server setup in step-by-step.
 Scenario:
We are running Ubuntu Server Edition. The team planned to make this one as a jump server for our production environment. Also, manage user access from the Windows Active directory.
 Solution:
First, convert the Ubuntu server edition to the desktop by installing GUI packages and configure the RDP-ready access for login remotely for all. Then configure the authentication with AD users with LDAP.
Key Skills:
Ubuntu Server, XRDP, Windows Active Directory, SSSD, LDAP.
 Summary of Steps :
1. Ubuntu Jump Server setup — Install Ubuntu GUI and enable Desktop Mode
2. Configure XRDP for remote RDP connections
3. Join Ubuntu to Active Directory - Connect Active Directory users to Ubuntu
1. Install Ubuntu Desktop Environment
Install Cinnamon and Xrdp on Ubuntu 22
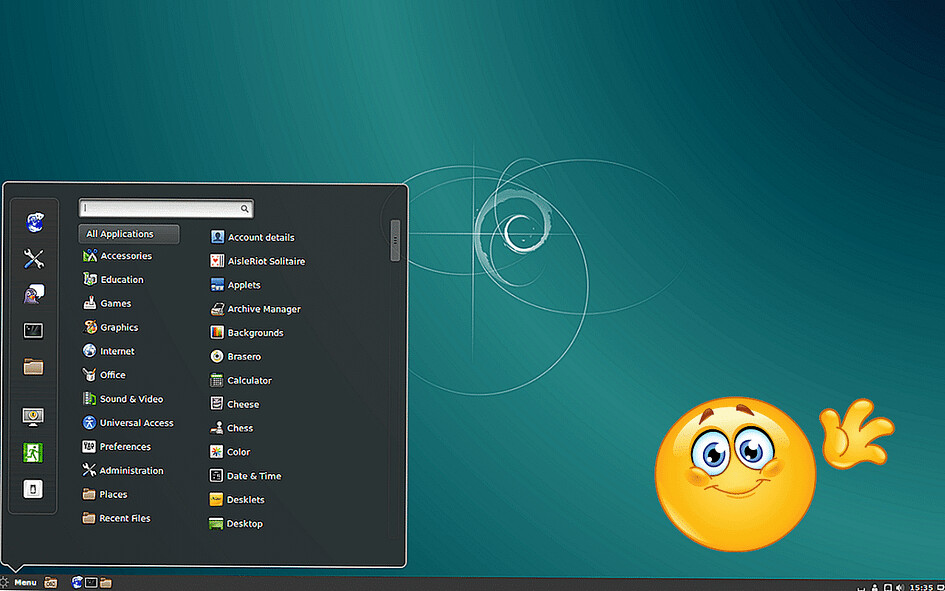
Desktop — Ubuntu
Install Cinnamon GUI Desktop for the Ubuntu server it’s easy.
you can choose other Desktop Environments also like Mate, and XFCE.
First, we need to install packages for Ubuntu GUI with RDP for production environments.
let’s configure.
Step 1: Always Update your system first
sudo apt-get update
Step 2: Install the Required Packages
#Install Cinnamon GUI
sudo add-apt-repository universe
sudo add-apt-repository multiverse
sudo apt update -y
sudo apt-get install cinnamon -y
2. Configure XRDP for remote RDP connections
Install XRDP packages
sudo apt install xrdp -y
Step 3: Enable the service while boot and start the service
systemctl start xrdp && systemctl enable xrdp
By this, we are adding RDP enablement on the Ubuntu machine.
Security Tips:
In default, there is no security on the RDP connection. If you need a Secure SSL connection, Please check here.
If you wish to run RDP on a different port change the port settings on /etc/xrdp/xrdp.conf
Step 4: Allow From the firewall (optional)
sudo ufw allow from 192.168.1.0/24 proto tcp to any port 3389
Note: In IP address field enter your subnet
Step 5: Config Xclients
echo "cinnamon" > ~/.Xclients
chmod +x ~/.Xclients
Step 6: Restart the Xrdp service
sudo systemctl restart xrdp.service
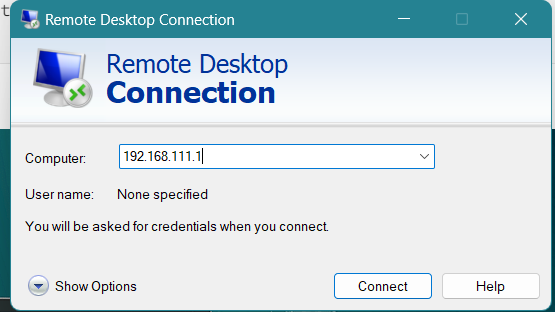
Step 7: Log in via RDP IP:3389.
3. Connect Active Directory users to Ubuntu(SSO):
Active Directory (Domain Joining) to Ubuntu
Joining a Windows Active Directory (AD) domain can enhance the management of Linux systems within a Windows environment, enabling centralized authentication and policy enforcement. This guide will walk you through the process of joining a Ubuntu or Debian machine to a Windows AD domain.
Prerequisites
Before proceeding, ensure you have the following:
- Administrative Access: You need sudo or root access on the Ubuntu/Debian machine.
- Domain Information: Know the Fully Qualified Domain Name (FQDN) of your AD domain (e.g.,
example.com). - Required Packages: Ensure you have the necessary packages installed on your system.
Step 1: Install Required Packages
To join an AD domain, you need to install the realmd, sssd, and adcli packages. Open a terminal and run the following command:
sudo apt update
sudo apt install realmd sssd adcli samba-common-bin
These packages enable integration with the AD and provide the necessary tools for joining the domain.
Step 2: Discover the Active Directory Domain
Host file:
Before that we need to Add /etc/hosts:
root@server-1:~# vim /etc/hosts
127.0.1.1 server-01
192.168.111.1 example.com EXAMPLE.COM
Use the realm command to discover the `AD` domain:
realm discover example.com
Replace example.com with your actual domain name. If the discovery is successful, you should see details about the domain, including its configuration.
Step 3: Join the Active Directory Domain
To join the domain, use the following command:
sudo realm join --user=administrator example.com
Replace administrator with a user account that has permission to join computers to the domain. You will be prompted to enter the password for the specified user.
Example:
sudo realm join --user=admin@example.com example.com
Step 4: Verify the Domain Join
After successfully joining the domain, verify the configuration by running:
realm list
This command displays information about the domain you’ve joined, confirming that the machine is part of the domain.
Expected Output Example:
example.com
  type: kerberos
  realm-name: EXAMPLE.COM       # DOMAINNAME
  domain-name: example.com
  configured: kerberos-member
  server-software: active-directory
  client-software: sssd
  required-package: sssd-tools
  required-package: sssd
  required-package: libnss-sss
  required-package: libpam-sss
  required-package: adcli
  required-package: samba-common-bin
  login-formats: %U
  login-policy: allow-permitted-logins
  permitted-logins:
  permitted-groups:
Step 5: Configure SSSD (Optional)
SSSD (System Security Services Daemon) can be configured to manage user authentication from the AD. Edit the SSSD configuration file at /etc/sssd/sssd.conf to customize settings as needed.
Example configuration for sssd.conf:
[sssd]
domains = example.com         # DomainName
config_file_version = 2
services = nss, pam
[domain/example.com]
default_shell = /bin/bash
ad_server = example.com        # DomainName
krb5_store_password_if_offline = True
cache_credentials = True
krb5_realm = EXAMPLE.COM        # DOMAINNAME
realmd_tags = manages-system joined-with-adcli
id_provider = ad
fallback_homedir = /home/%u       # only username without @domain.com
ad_domain = example.com           # DomainName
use_fully_qualified_names = False # only username without @domain.com
ldap_id_mapping = True
access_provider = simple
ldap_sasl_authid = SERVER-1$
ldap_sasl_mech = GSSAPI
#simple_allow_groups =               # AD Group Name allow users only from this group
#ad_gpo_access_control = enforcinig  # Enable GPO for ubuntu
#ad_gpo_ignore_unreadable = True     #
- fallback_homedir = /home/%u : home directory location. %u mentions the username.
- use_fully_qualified_names : If this is enabled username should be entered as @<domain.com>
Ex:
AD username: karthick AD name: example.com
In Ubuntu username will be: karthick@example.com
- simple_allow_groups : Only Allow specified AD groups, other users will deny.
Step 6: PAM Configuration
By editing the `/etc/pam.d/xrdp-sesman` file, enable PAM authentication for RDP connections.
#%PAM-1.0
auth required pam_env.so readenv=1
auth required pam_env.so readenv=1 envfile=/etc/default/locale
session optional pam_mkhomedir.so skel=/etc/skel/ umask=0077
@include common-auth
@include common-account
@include common-session
@include common-password
Update pam
sudo pam-auth-update - enable mkhomedir
Edit nsswitch:
Edit the /etc/nsswitch.conf and change the below parameters.
passwd: compat systemd sss
group: compat systemd sss
shadow: compat sss
#config end
Restart the services:
sudo systemctl restart sssd xrdp
Step 7: Test Domain User Authentication
To test if domain users can log in, you can use the following command:
id username@example.com
(OR)
getent passwd <AD_username>
Replace username@example.com with the actual domain user account. If successful, the output will display the user ID and groups associated with that account.
Example:
getent passwd user1
user1:*:1971415214:1971400513:user:/home/user1:/bin/bash
Ubuntu AD Domain integration with GUI
Joining an Ubuntu or Debian system to a Windows AD domain allows for streamlined user management and authentication.
By following these steps, you can successfully integrate your Linux system into a Windows-based environment. Ensure that security and policy settings are reviewed to maintain a secure configuration that aligns with your organization’s requirements.
Additional Considerations
- Firewall Settings: Ensure that your firewall settings allow traffic to and from the domain controller.
- DNS Configuration: Properly configure your DNS settings to resolve the domain controller’s address.
- Logging and Monitoring: Implement logging and monitoring solutions to track domain join operations and user authentications.
With this setup, your Ubuntu/Debian system will be better integrated into your organizational infrastructure, enhancing both usability and security.