Complete Setup Guide for Newt-Tailscale Failover Gateway
Introduction
Reliable connectivity to your internal networks is critical for both personal projects and business operations. While VPN and tunnel services like Newt and Tailscale offer excellent connectivity solutions, unexpected downtime can still occur due to service disruptions, network issues, or maintenance.
The Newt-Tailscale Failover Gateway solves this problem by creating an automatic failover mechanism between these two services. When one fails, the gateway seamlessly redirects traffic through the other, ensuring continuous connectivity without manual intervention.
In this guide, I’ll walk you through setting up your own failover gateway, configuring it for your specific needs, and monitoring its operation.
Prerequisites
Before we begin, make sure you have:
- Docker and Docker Compose installed on your host
- A Tailscale account with an auth key (business plan recommended for subnet routing)
- A Newt ID and Secret from your Pangolin deployment
- Basic understanding of networking concepts
- A server/machine with Linux that will run the gateway
Understanding How It Works
The gateway continuously monitors the health of both Newt and Tailscale connections. When it detects that the primary service has failed (based on configurable thresholds), it automatically switches traffic to the backup service. Once the primary service returns to a healthy state, traffic is switched back.
For this to work properly, Tailscale must be configured to advertise routes to the same private networks that Newt connects to. This ensures that when traffic switches from one service to the other, it can still reach the same internal destinations.
Basic Installation
Let’s start with a basic installation:
- Create a new directory for your failover gateway:
mkdir failover-gateway
cd failover-gateway
- Create a
.envfile with your configuration (use theenv.exampleas a template):
# Core Configuration
ENABLE_FAILOVER=true
FAILOVER_MODE=immediate
PRIMARY_SERVICE=newt

# Health Check Configuration
HEALTH_CHECK_INTERVAL=10
HEALTH_CHECK_TIMEOUT=5
HEALTH_CHECK_FAILURES_THRESHOLD=3
HEALTH_CHECK_RECOVERY_THRESHOLD=5

# Newt Configuration
NEWT_ID=your-newt-id
NEWT_SECRET=your-newt-secret
PANGOLIN_ENDPOINT=https://your-pangolin-server.com

# Tailscale Configuration
TAILSCALE_AUTH_KEY=tskey-auth-xxxxx-xxxxxxxxxxxxx
TAILSCALE_HOSTNAME=failover-gateway
TARGET_PORTS=80,443,3000,8080
TAILSCALE_ADVERTISE_ROUTES=192.168.1.0/24
- Create a
docker-compose.ymlfile:
services:
  failover-gateway:
    image: hhftechnology/failover-newt-tc:latest
    privileged: true
    cap_add:
      - NET_ADMIN
      - SYS_MODULE
    security_opt:
      - apparmor:unconfined
    sysctls:
      - net.ipv4.ip_forward=1
    environment:
      - ENABLE_FAILOVER=true
      - FAILOVER_MODE=immediate
      - PRIMARY_SERVICE=newt
      - HEALTH_CHECK_INTERVAL=10
      - HEALTH_CHECK_TIMEOUT=5
      - HEALTH_CHECK_FAILURES_THRESHOLD=3
      - HEALTH_CHECK_RECOVERY_THRESHOLD=5
      - NEWT_ID=${NEWT_ID}
      - NEWT_SECRET=${NEWT_SECRET}
      - PANGOLIN_ENDPOINT=${PANGOLIN_ENDPOINT}
      - ENABLE_NEWT=true
      - TAILSCALE_AUTH_KEY=${TAILSCALE_AUTH_KEY}
      - TAILSCALE_HOSTNAME=failover-gateway
      - TARGET_PORTS=80,443,3000,8080
      - TAILSCALE_ACCEPT_DNS=true
      - TAILSCALE_ADVERTISE_ROUTES=${TAILSCALE_ADVERTISE_ROUTES}
    volumes:
      - ./data/tailscale:/var/lib/tailscale
      - /lib/modules:/lib/modules:ro
    devices:
      - /dev/net/tun:/dev/net/tun
    ports:
      - "9095:9090"
    restart: unless-stopped
- Start the gateway:
docker-compose up -d
- Approve route advertisements in the Tailscale admin console.
After the container starts, you’ll need to go to your Tailscale admin console and approve the route advertisements. This is a critical step - without it, the failover will not work correctly.
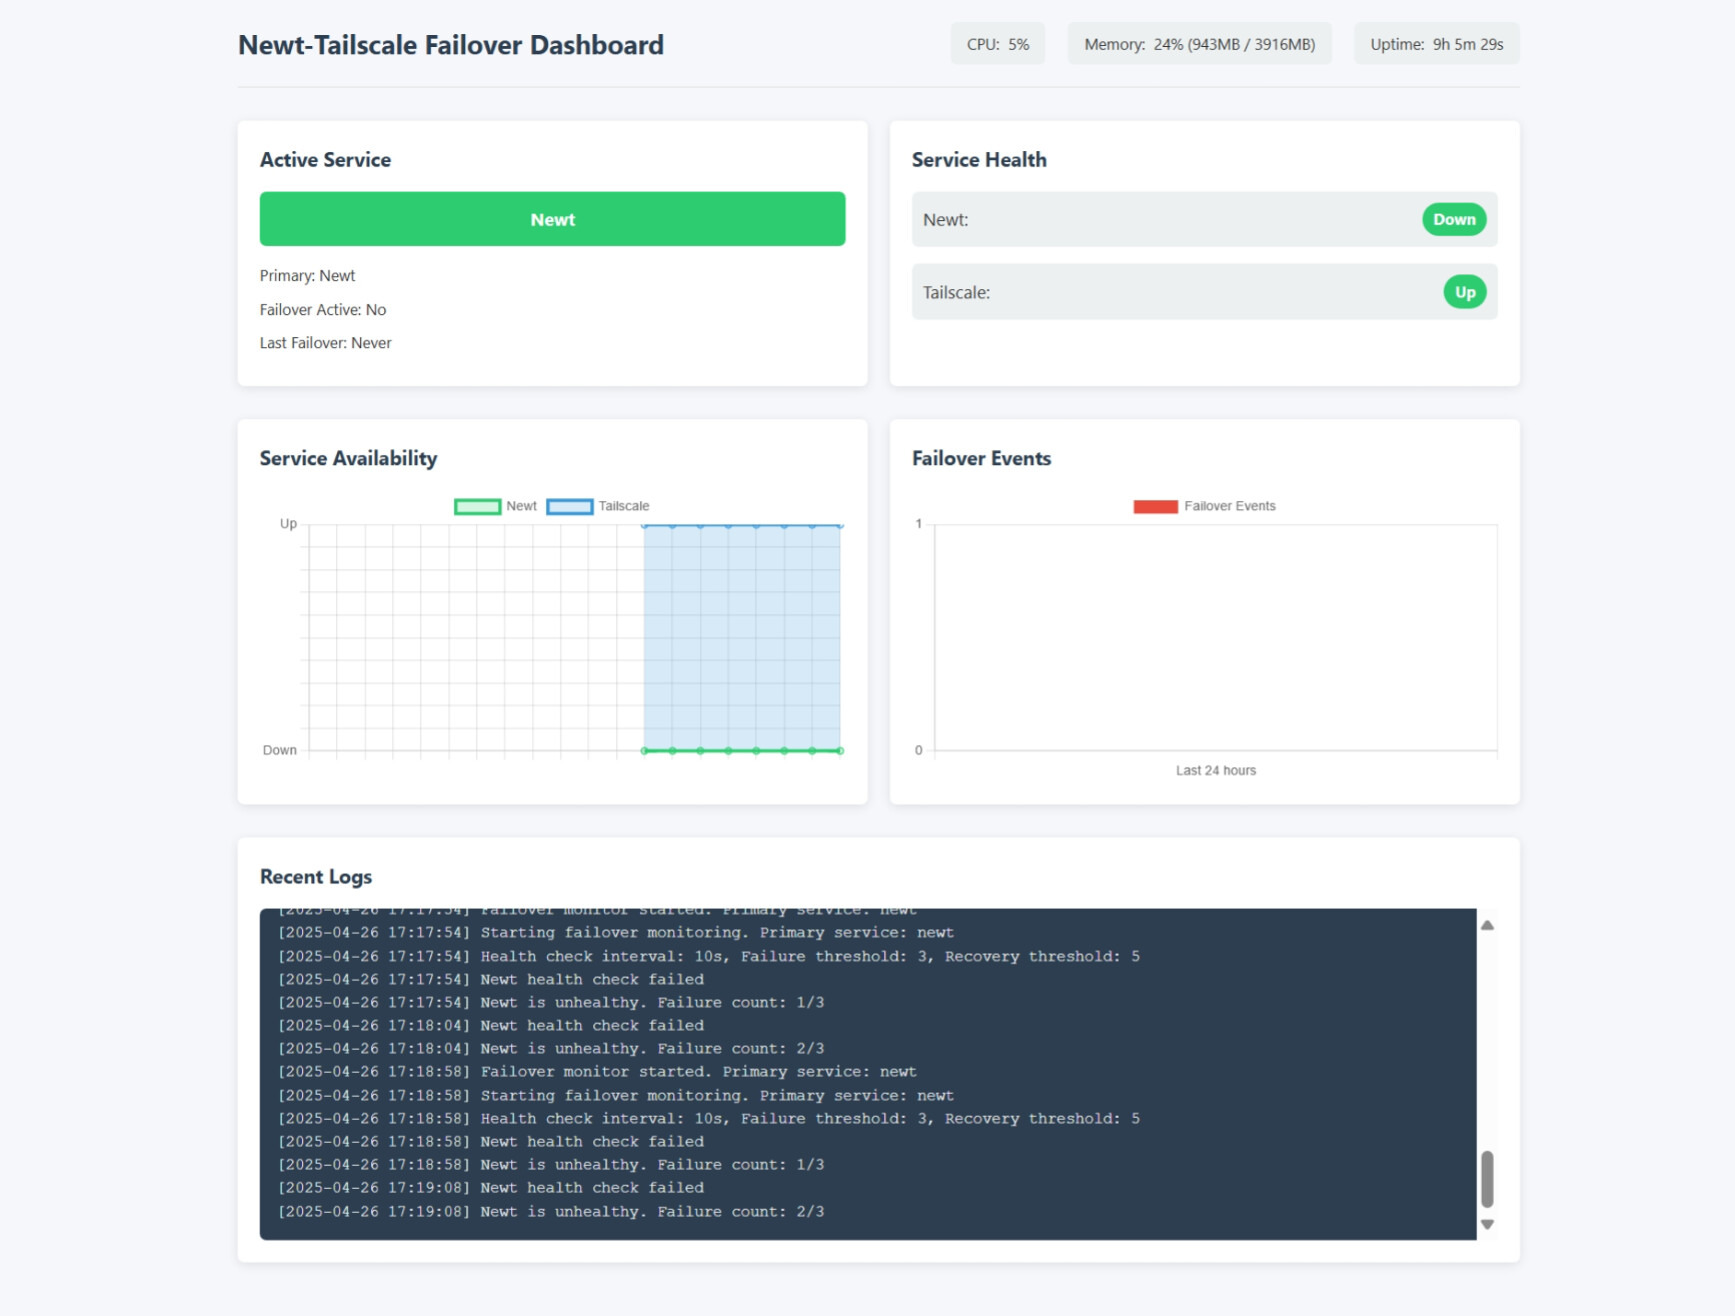
Accessing the Dashboard
Once your gateway is running, you can access the monitoring dashboard at:
http://your-server-ip:9095
The dashboard shows:
- Current active service (Newt or Tailscale)
- Health status of both services
- Failover history and events
- System resource usage
- Recent logs
Configuration Options Explained
Failover Modes
The gateway supports two failover modes:
-
Immediate (
FAILOVER_MODE=immediate): Traffic is instantly switched to the backup service when a failure is detected. This minimizes downtime but may cause some active connections to drop. -
Gradual (
FAILOVER_MODE=gradual): New connections go through the backup service, while existing connections continue through the primary until they naturally terminate. This prevents disruption of established connections but takes longer to complete the failover.
Health Check Settings
You can fine-tune how the gateway detects failures and recoveries:
HEALTH_CHECK_INTERVAL: Time between health checks (seconds)HEALTH_CHECK_TIMEOUT: How long to wait for a health check to completeHEALTH_CHECK_FAILURES_THRESHOLD: Number of consecutive failures before triggering failoverHEALTH_CHECK_RECOVERY_THRESHOLD: Number of consecutive successful checks before switching back
Lower values result in faster failover but may cause unnecessary switching due to momentary network blips.
Primary Service Selection
By default, Newt is the primary service (PRIMARY_SERVICE=newt). If you prefer Tailscale to be primary, change this to:
PRIMARY_SERVICE=tailscale
Port Forwarding
The TARGET_PORTS environment variable specifies which ports should be forwarded through the active tunnel:
TARGET_PORTS=80,443,3000,8080
Add any ports your services require.
Advanced Setup: Monitoring and Notifications
To receive notifications when failover events occur:
environment:
  - ENABLE_NOTIFICATIONS=true
  - NOTIFICATION_WEBHOOK=https://your-webhook-url.com
This will send a webhook notification whenever the gateway switches between services.
Advanced Setup: Production Environment
For production environments, consider these additional configurations:
services:
  failover-gateway:
    # ... other settings from above
    healthcheck:
      test: ["CMD", "wget", "-q", "--spider", "http://localhost:9090/api/status || exit 1"]
      interval: 30s
      timeout: 10s
      retries: 3
    networks:
      - frontend
    labels:
      - "traefik.enable=true"
      - "traefik.http.routers.failover-dashboard.rule=Host(`failover.yourdomain.com`)"
      - "traefik.http.services.failover-dashboard.loadbalancer.server.port=9090"

networks:
  frontend:
    driver: bridge
This adds:
- Container health checks for monitoring
- Network isolation
- Traefik labels for secure access to the dashboard
Troubleshooting Common Issues
Failover Not Working
If services aren’t failing over properly:
- Check that Tailscale route advertisements are approved in the admin console
- Verify that both services are properly configured
- Check the logs:
docker compose logs failover-gateway - Ensure the container has the necessary permissions (NET_ADMIN capability)
Can’t Access Services After Failover
If you can’t access your services after a failover:
- Verify that Tailscale is advertising the correct routes
- Check that the TARGET_PORTS include all necessary service ports
- Verify IP forwarding is enabled on the host
- Check iptables rules inside the container
Dashboard Not Loading
If you can’t access the dashboard:
- Verify the container is running:
docker compose ps - Check port mapping:
docker compose port failover-gateway 9090 - Check logs for dashboard errors:
docker compose logs failover-gateway | grep dashboard
Maintenance and Monitoring
Regular maintenance tasks:
- Check logs regularly:
docker compose logs --tail=100 failover-gateway - Update the container:
docker compose pull && docker compose up -d - Monitor dashboard metrics for unusual failover patterns
- Rotate Tailscale auth keys periodically for security
Conclusion
The Newt-Tailscale Failover Gateway provides a robust solution for ensuring continuous connectivity to your internal networks. By automatically switching between services when issues occur, it eliminates manual intervention and minimizes downtime.
This solution is especially valuable for:
- Home labs requiring reliable remote access
- Small business environments
- DevOps teams managing infrastructure
- Remote workers needing dependable VPN access
With proper configuration and monitoring, you can achieve near-perfect uptime for your critical networking needs, even when individual services experience disruptions.